
Free
How To Work With SVG Files In Doodly
Discover the Power of SVG Image Format in Doodly!
In our last blogs, we explored the differences between popular image formats. Today, we’re diving into the world of SVG image format, a format often overlooked in our everyday use of social media.
What makes SVG files special? Unlike other image formats, SVG relies on vector data instead of pixels. While JPEG and PNG files are familiar raster graphics, SVG files are known as vector graphics, storing images as sets of points and lines.
Now, let’s compare SVG and PNG, both fantastic options in Doodly.
PNG versus SVG

Both PNG and SVG formats offer transparent backgrounds, allowing for easy navigation of assets. No more worries about visible borders! However, each format has its own unique attributes.
Let’s start with SVG files. They are scalable, meaning you can resize them without sacrificing image quality. No more grainy or pixelated images! On the other hand, PNG images may lose clarity when scaled up too far or become indistinct when too small.
In terms of file size, PNGs tend to be larger due to their ability to handle high resolutions. This can lead to slower processing. SVGs, on the other hand, are smaller in size, ensuring smooth operation of your computer. However, be careful not to overload an SVG image with too many drawing paths, as it can slow down image loading.
Now, let’s take a closer look at actual PNG and SVG images. We selected a simple black line drawing of a dachshund from pixabay.com.
When we increased the size of the 46 kB PNG file, the lines became jagged. Even when choosing larger resolutions, the same result occurred. However, when we increased the size of the SVG image, it remained clear and crisp.
Discover SVG’s Drawing Paths
One advantage of SVG files is the inclusion of “draw paths.” While PNG formats don’t have this feature, Doodly allows you to add draw paths to imported images. SVG files make this process even easier, as draw paths are already included.
Draw paths are essential for animating images and creating the illusion of hand-drawn strokes. With SVG, you’ll achieve a truly realistic hand-drawn animation effect.
Let’s dive into the draw path of an SVG image!
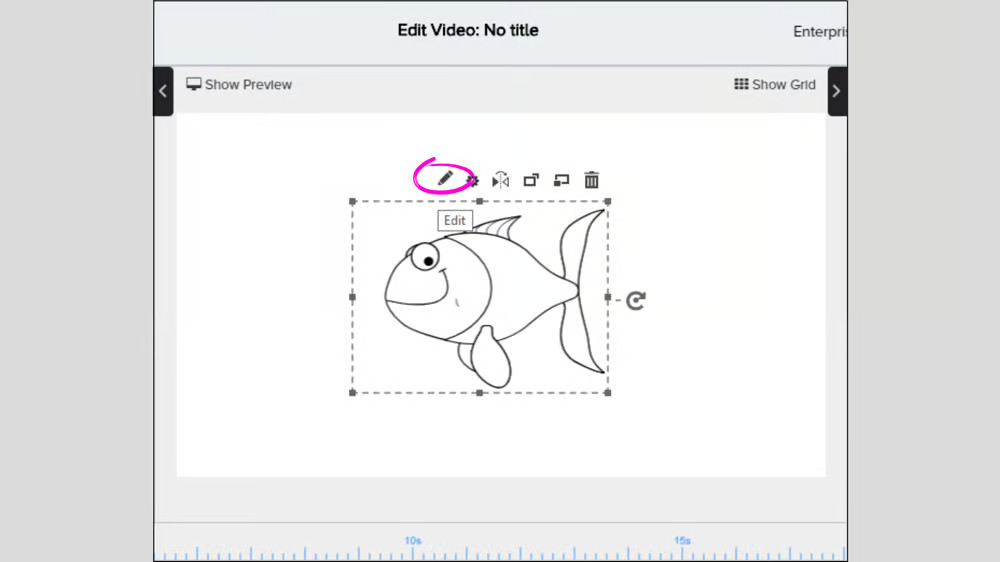
When you open the Edit Asset screen, you’ll notice your image being scribbled diagonally on the upper right side. This default animation reveals the image by scribbling instead of drawing.
To view the draw path of your imported SVG image, scroll down to Reveal Paths and click Load SVG Paths. Remember, this option is only available for SVG files.
There are a total of 17 layers for this simple SVG file. Each layer represents a drawing path. However, not all paths cover every draw line, resulting in faded or missing lines when the image is drawn.
To fix these imperfect lines, there are two easy ways:
a. Move the draw paths. Use the Move point cursor in the Tools menu to click on draw points near the gaps. Then, drag them to cover the exposed draw lines.
b. Fatten the draw path size. Click on draw points near the gaps, locate the Path size menu on the right side, and increase the size of the draw paths. You’ll see the lines become fuller and have solid coverage in the live preview screen.
Adding draw paths manually is not always necessary for Doodly images. While it can make your animation look neat, keep in mind that images are usually drawn in less than 5 seconds. Our default animation is only 3 seconds, and sometimes you need to prioritize other elements in your video. Don’t spend too much time perfecting draw paths if it’s not essential.
However, some preset draw paths in an SVG file may be inaccurate or chaotic. If this is the case, you can add your own draw paths.
Check out this example:
The image above is an actual SVG image downloaded from pixabay. As you can see, the draw path is only added to the edges, beak, head, and bottom of the image. Unfortunately, this doesn’t create a good animation. If you’re facing the same issue, don’t worry! You have two options: fix the existing draw paths or start from scratch.
Here’s how you can add your own draw paths:
1. Remove the existing draw path.
In some cases, removing a few draw paths and adding your own can fix the issue. However, with the given sample SVG file, it’s easier to clear all the draw paths and start fresh. Simply click on “Clear All” after loading the SVG paths.
2. Maximize your image.
Before adding your own draw path, it’s best to zoom in on your image. This will give you a clearer view of the lines and make it easier to add your draw paths.
3. Add your draw paths.
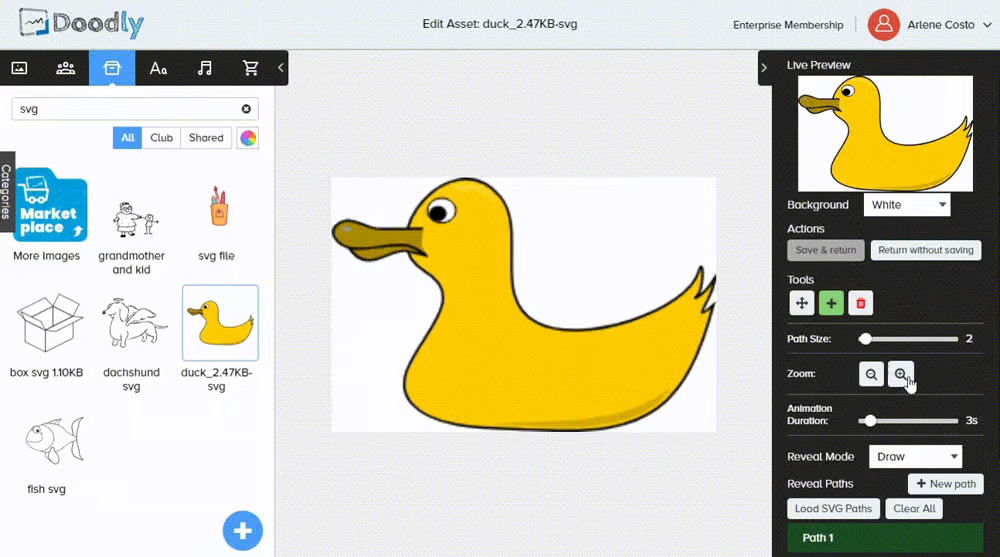
Once you’re comfortable with the image size, you can start adding your draw paths. You have complete control over the strategy – where to begin, which path to make thin or thick. Just make sure your image is fully covered by draw paths. If you’re working with colored images, like our sample image, filling in the entire image with draw paths will create the illusion of coloring the picture.
For the image above, we started with a thin draw path following the black lines and then added thick lines to reveal the duck’s body. If you don’t have much time, you can use thick draw paths throughout the drawings for faster coverage.
4. Don’t forget to save your changes.
Complex SVG Draw Paths
Some SVG formats have complex details, with a large number of draw paths. Imagine having 627 draw paths in a single image! There are even images with more draw paths and greater details than our sample image. Can these be used in Doodly?
Well, the maximum SVG file size that Doodly can import is 360kB, which is the same as our example. While you can import these larger images, they may not work seamlessly compared to smaller SVG files. They may cause lag and freeze during scene transitions. That’s why it’s best to use simple, less complex SVG images. The smaller the size, the better.
If you really want to use images with more details, you can try reducing the number of draw paths or changing the reveal mode to Fade instead of Draw. This will help the images load faster and smoother, even with a high number of draw paths.
Converting PNG to SVG
If you have a PNG image and want to convert it to SVG, there is a solution. You can use software or a web-based program that allows PNG images to be converted to SVG files. This will make your image scalable and add a draw path, which you can then load in Doodly. However, keep in mind that some of these draw paths may not fully cover your image, so you may need to redo them in Doodly.
And that’s all for today’s blog. Whether you choose PNG or SVG, it all depends on how you’ll use it in your Doodly project. Both formats are ideal for use in Doodly. Until next time! 🙂


