Free
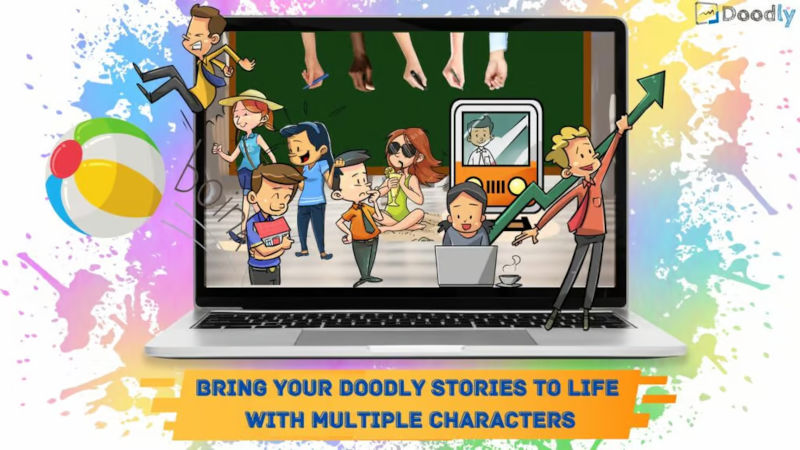
Bring Your Doodly Stories to Life with Multiple Characters
Want to make your scenes come alive with multiple characters? Doodly has got you covered! Creating engaging and visually appealing stories just got easier. But we know it can be tricky to make all the characters look like they belong together. That’s where our simple solution comes in: each character gets their own separate scene.
Before you dive into adding multiple characters, take a moment to think about your message. Are you focusing on one main character or highlighting different characters in the same scene? This will help guide your creative choices.
Now, let’s explore some techniques for adding multiple characters in a scene:
Choose a character-based animation style. Opt for hand-drawn or claymation videos to create a realistic interaction between characters. And remember, smooth animation is key to keeping your audience’s eyes happy!
Use different camera angles. Play with perspective to give depth and scale to your scene. Try close-up shots and far shots to make it seem like characters are in the same room but at different distances.
Make each character slightly different. Add unique touches to differentiate characters without making them identical. Maybe they wear the same clothes, but with different shoes and accessories? Get creative with outfit variations!
Keep a consistent perspective. Adjust character positions so they all face the same direction, making it appear as if they’re part of the same scene.
Play with lighting. Use different colored lights or light bulbs on each character’s face to create a sense of location and multiple light sources. It adds depth and interest to your scene.
Vary body types and facial features. Mix it up! Different body types and facial features can make characters look distinct or similar, depending on your creative vision.
Now that we’ve covered some techniques, let’s put them into practice in Doodly.
Adding Multiple Characters in Doodly:
In Doodly, managing multiple characters in one scene is a breeze. Just keep in mind three key factors: Arrangement, Opacity, and Size.
Example No. 1:
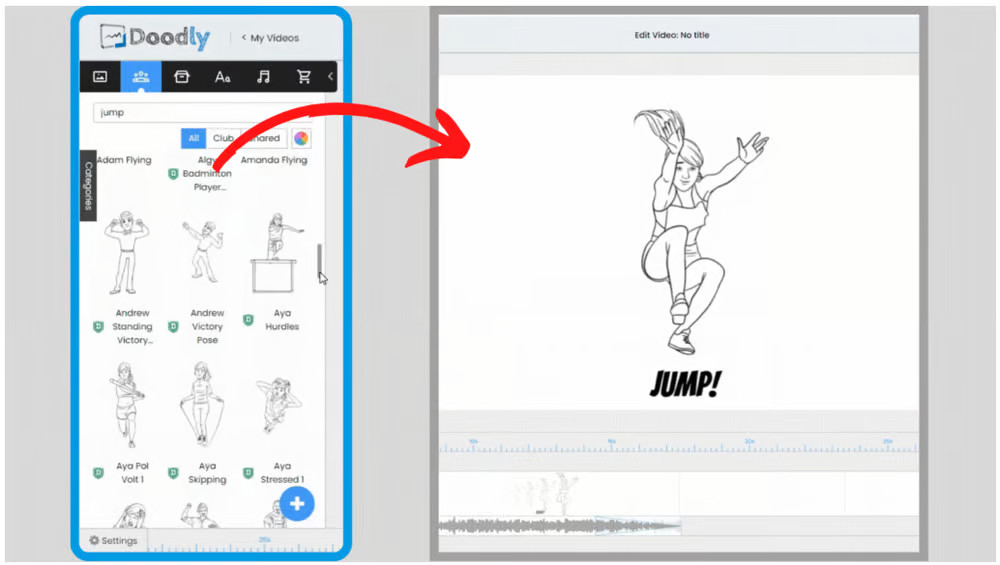
If you want to showcase a character jumping in your video, why settle for one when you can have three? Let’s achieve that dynamic effect together. Just follow these steps:
Step 1.

Choose your character: Look through Doodly’s character options or upload your own image. For this example, we’ll go with Aya from Doodly’s collection.
Step 2.
Copy and Paste: To have multiple characters in one scene, copy the image and paste it four times on the same scene. Simple as that! (Windows users, press CTRL+C to copy and CTRL+V four times to paste.)
Step 3.

Arrange the characters: Arrange the characters horizontally and adjust their sizes from smallest to biggest. Make sure the spacing between each character is consistent.
Step 4
– Enhancing Character Appearance
Now, let’s make each character stand out by adjusting their opacity. We’ll start with the first character at 40% opacity, then gradually increase it as we move from left to right. The largest character will have 100% opacity.
Take a look at our video:
Example No. 2:
Now that we know how to work with multiple images, let’s try it with different characters. This time, the characters won’t be arranged in order of size. They’ll be scattered randomly in the scene. We’ll still adjust their opacity, with smaller characters having a lower opacity. Depending on your video’s story, you can also add shadows to define each character’s role.
Example No. 3:
In this bonus example, we’ll use a character from outside Doodly. You can also find characters in free resources like PowerPoint. The best part is, you can adjust each character to capture the angle you like, giving them depth and movement. This can also help connect characters and make them look related. While not all characters are available in PowerPoint, it’s worth checking out their list to see if there’s anything you can use.
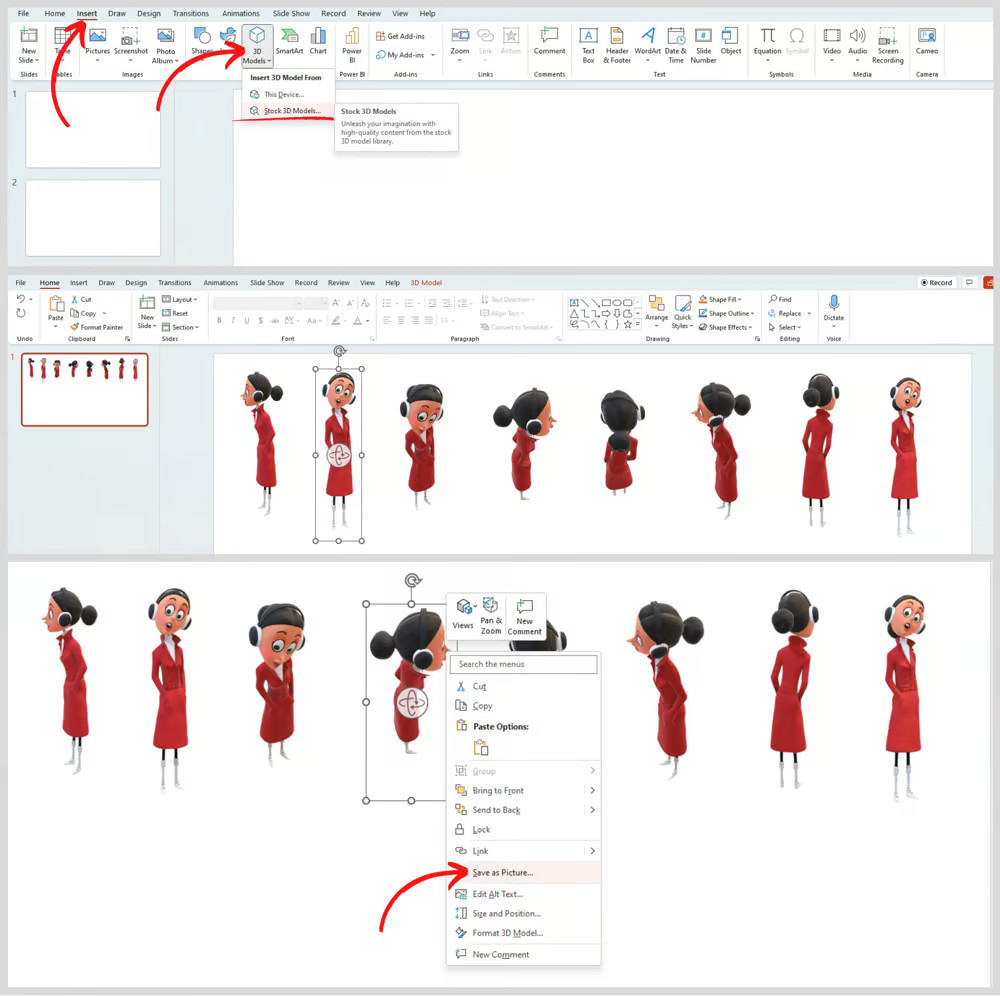
To get assets from PowerPoint:
1. Click the Insert tab and select 3D models.
2. Choose Stock 3D models from the options.
3. Select a character from the available options.
4. Adjust the character’s angle to your liking.
5. Right-click on the character and save it as a PNG to use it as a picture.

Remember, Doodly allows you to flip characters from left to right as well. For your chosen character, you may want to export either the top or bottom view.
We’ve created a template video using PowerPoint’s characters, but it doesn’t have any voiceover or speech bubbles yet. If you have a script ready, you can record your voiceover directly in Doodly.
Conclusion
Characters are powerful tools for storytelling. By adding more Doodly characters to your scenes, you can make your story more detailed and engaging. When adding multiple characters, remember to consider the arrangement, opacity, and size.
Feel free to experiment with character layouts and timing to make them work best for your story. Different approaches suit different situations, so don’t be afraid to try new things. The key is to have fun and unleash your creativity with your characters. Happy doodling!


