Free
How to Overlay Video with Hand-Drawn Animation
Want to add some pizzazz to your videos? Overlaying video with hand-drawn animation is a fantastic idea that will make your content stand out. Mixing animation with traditional video creates a unique and captivating effect that will wow your audience.
Luckily, it’s super easy to do using Doodly whiteboard animation software and a third-party video editor. In this blog post, we’ll walk you through the process of overlaying video with hand-drawn animation in a video tutorial.
If you’re more of a reader, don’t worry. We’ve got step-by-step instructions with screenshots right below the video.
Let’s dive in!
In this video tutorial, our expert Doodler, Pamela Dimmick, will show you exactly how to overlay film with animation using Doodly and video editing software.
If you prefer written instructions, here they are:
1. Create a Doodly Video with a Green Background
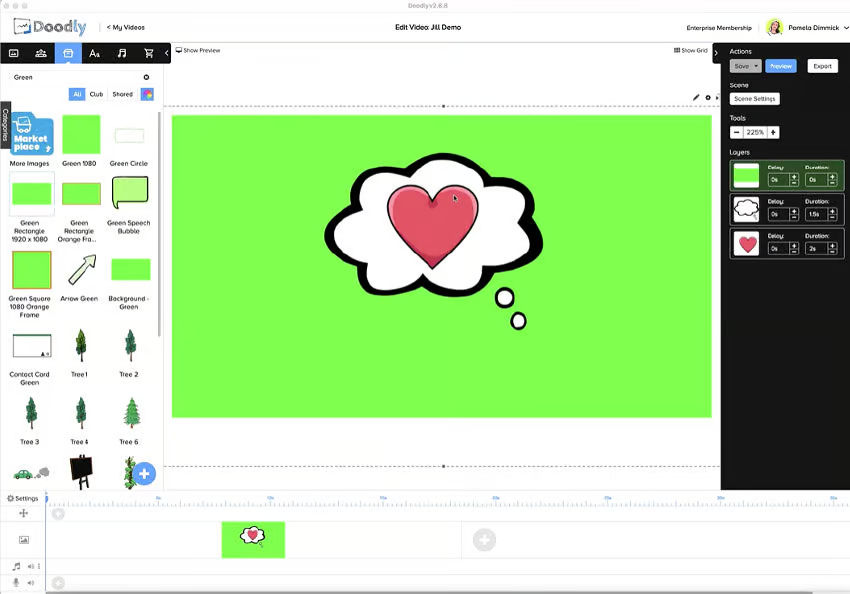
First off, you’ll need a hand-drawn animation video to get started. Use Doodly, a user-friendly whiteboard animation software, to create your video. Begin by setting the background color to a bright lime green using a green rectangle image we’ve provided.
Why lime green? Because it’s an attention-grabbing color that’s rarely seen in videos. This color will be removed later using chroma key, giving your animation a seamless overlay effect.
2. Add Your Video Assets to Your Doodly Video
Once you’ve set up the green background, it’s time to add your video assets on top of it. Drag and drop your video files onto the green background to position them just right.
3. Export Your Doodly Video
When you’re satisfied with your Doodly video, export it with your desired file resolution. You’re one step closer to adding the hand-drawn animation overlay to your original video.
4. Create a New Project in Your Video Editing Software
Open your preferred video editing software and create a new project. We used Final Cut Pro in our example, but feel free to use any third-party software that meets your needs.
5. Import Your Film Footage
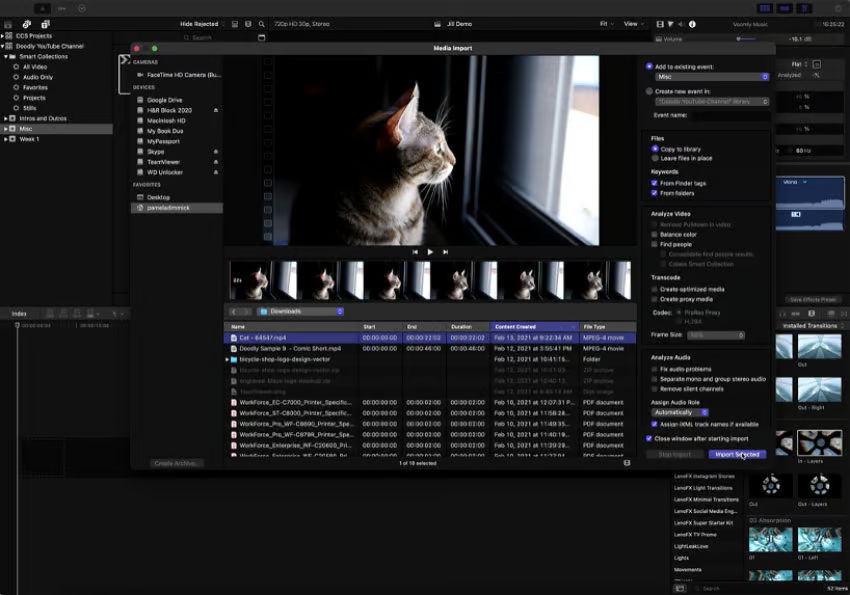
Import your original video footage into the new project you created in your video editing software. This will serve as the base video to which you’ll add your hand-drawn animation overlay.
6. Add Your Video to the Timeline
Drag and drop your film footage into the timeline of your video editing software. You’ll be able to edit it further in the following steps.
7. Import Your Doodly Video
Import your Doodly video into your project using the same process as before. Make sure you place the Doodly video on top of the live-action video in the timeline.
8. Add Your Doodly Video to the Timeline
Drag and drop your Doodly video onto the timeline, positioning it on top of the live-action video.
9. Select the Keying Option
Now it’s time to remove the green from your Doodly video. In Final Cut Pro, click on the Effects browser, select Keying, and choose the Keyer option.
10. Move the Keyer onto Your Doodly Video
Drag and drop the Keyer onto your Doodly video in the timeline. The green in your video will magically disappear.
11. Resize the Doodly Video
To make any necessary adjustments, resize your Doodly video using the Transform tool. This tool allows you to resize and move your Doodly video within the frame.
And there you have it!
Overlaying video with hand-drawn animation is a surefire way to make your content more engaging and memorable. Give it a try and see the amazing results for yourself.