Free
How to Create Your First Micro-Video with Doodly
Ever wondered what micro-video content is? It’s those short, snappy video clips that you see on platforms like Vine, Instagram, Snapchat, TikTok, and Facebook. These videos are not only educational but also aim to promote or sell something to viewers. They’re designed to grab your attention and make you take action, like subscribing or becoming a customer.
If you want to create micro-videos, Doodly is the perfect tool for the job. With Doodly, you can turn a 2-minute video into an animated, eye-catching micro-video without the need for any complicated editing. In this article, we’ll walk you through the basics of creating your own micro-video.
But before we dive in, let’s talk about the importance of having a script. While some may prefer to jump right into creating the scenes, having a script ready can save you time and prevent revisions later on. So grab a pen and paper, and let’s start writing your script before you start working on your Doodly scenes.
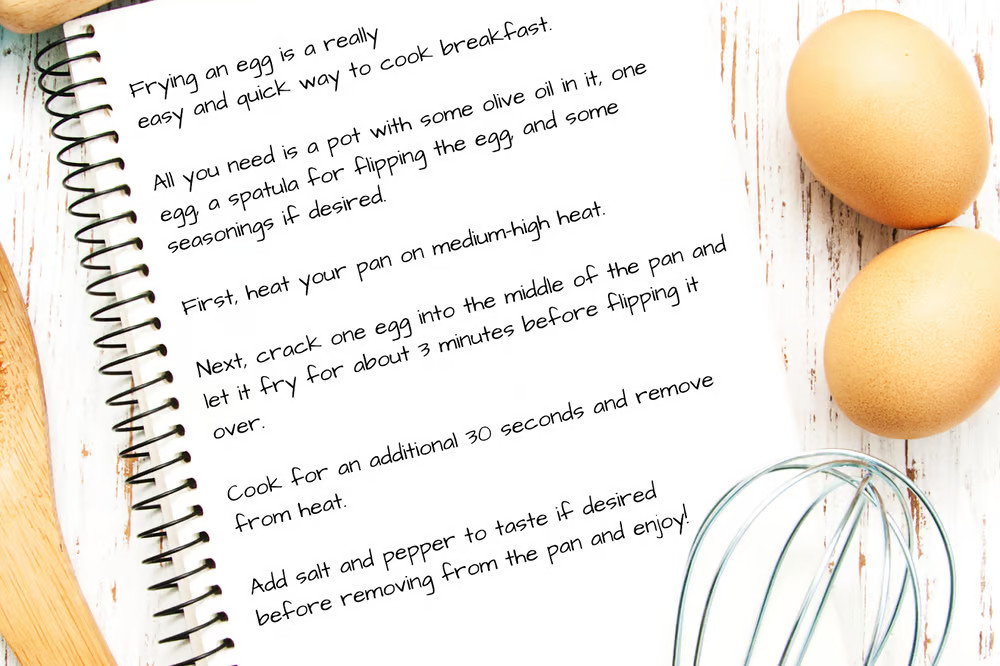
For our example micro-video, we’ll create a simple instructional video. Here’s a sample script to give you an idea:
Now that you have your script ready, let’s move on to creating the actual video. Our video will consist of 4 scenes, and we’ll show you exactly how to set them up using Doodly. We’ll provide the assets used, the settings applied, and how to arrange the layers. If you can’t find a specific asset you like, don’t worry – you can always upload your own files to use in your video.
Ready to get started? Let’s begin with our first scene.
Scene 1:
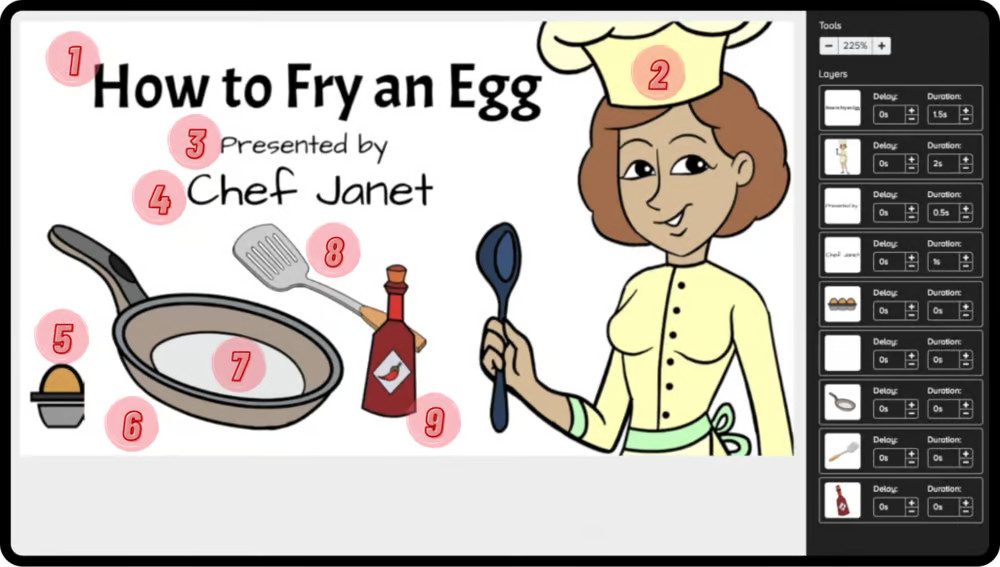
In this scene, you’ll see the video title and the presenter’s name. We’ve used colored images for the characters and props, but you can customize this to your preference. The key is to make sure the layers are organized correctly. We’ve numbered each character to show their order of appearance in the video. The default animation duration for images is 3 seconds and 1.5 seconds for text, but for a micro-video, we’ll change most of these to zero.
To update the animation duration, select the assets from the Layers menu and change the Enter Animation settings to zero.
Next, choose which assets you want to be hand-drawn and leave the rest as they are.
Now it’s time to add your voice-over. Simply click the “+” sign in the voice-over menu, and you can start recording.
Scene 2:
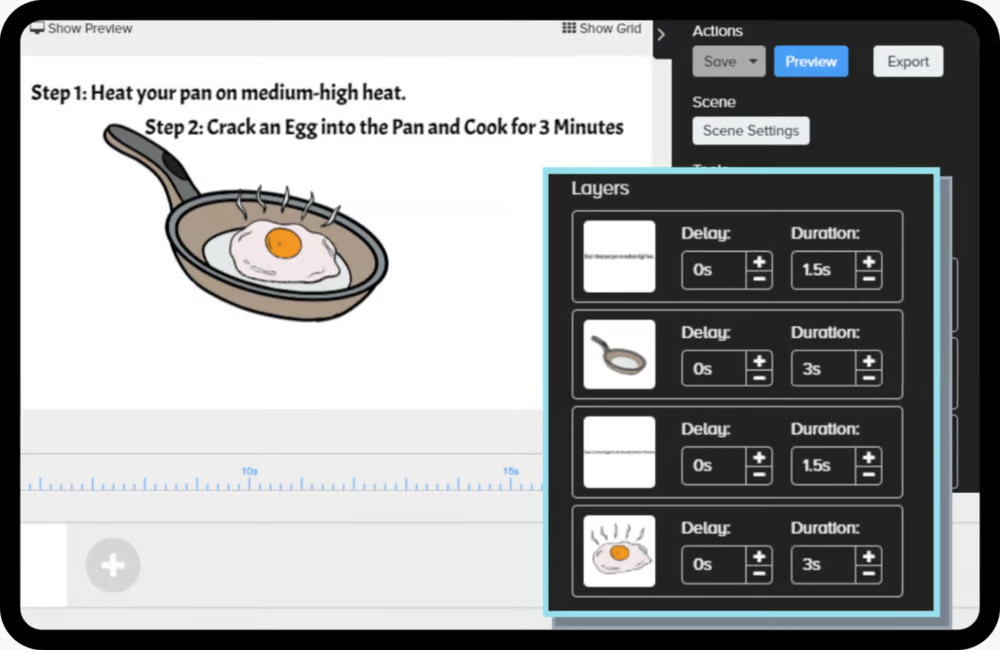
Moving on to the second scene, this is where we’ll cover the cooking instructions. We’ve used the font style “Acme Regular” and added assets like a frying pan and an egg. Unlike the first scene, we won’t change the animation duration for these assets.
To ensure a smooth transition to the next scene, we’ll set the Exit Animation for the second scene to “X.”
Scene 3:
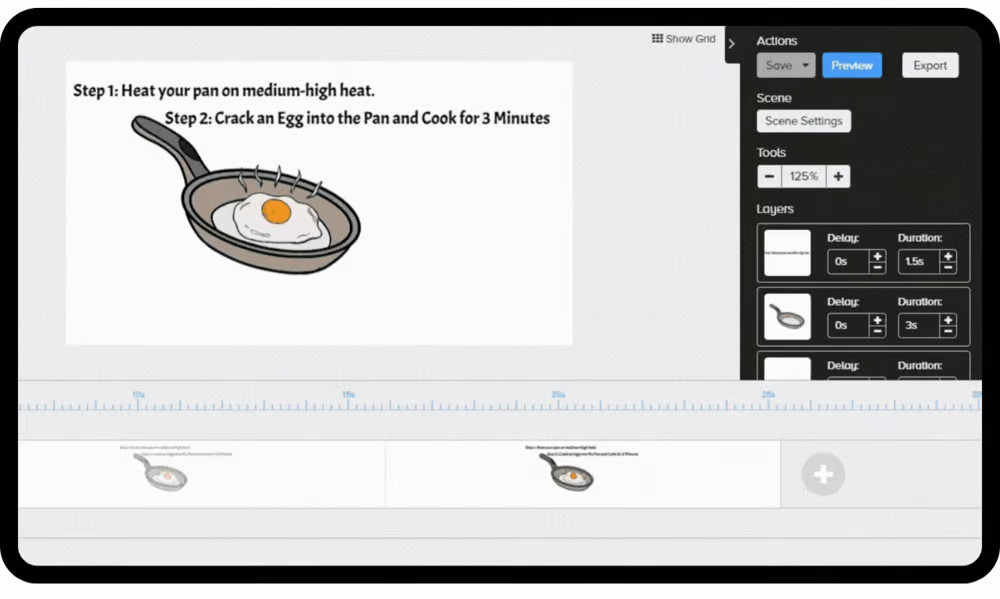
Setting Animation Duration to Zero
In this scene, we need to make our animation duration zero. There are two ways we can do this. First, we can manually change the animation duration from the Layers menu. Alternatively, we can use the shortcut CTRL + A to select all the assets, go to asset settings, and change the animation duration to zero.
Modify Assets:
Creating the Illusion
In order to create the illusion of lifting the cooked egg from the pan using the spatula, we will replace the egg on the frying pan with another image of an egg. Then, we will position the spatula behind the egg.
Scene 4:
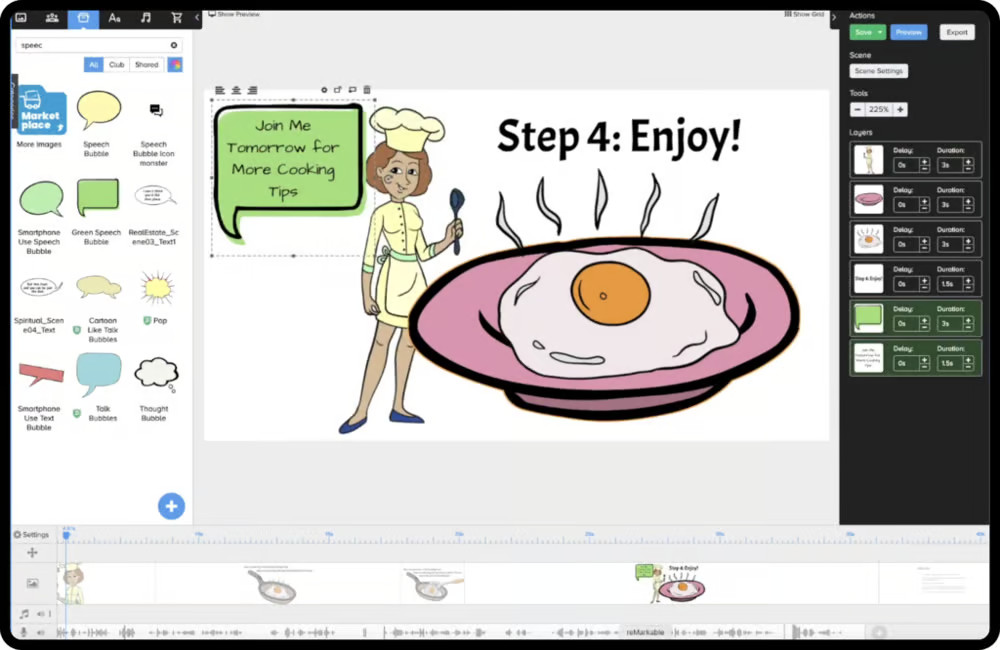
Enjoying the Cooked Egg
Our last scene is all about enjoying the cooked egg. This is where we will include our call-to-action. A call-to-action or CTA is a statement that tells the audience what to do next after watching an ad. In our case, we want viewers to know that we will be releasing more tips the next day and we want them to keep an eye out for that.
Preview It First:
Ensuring Sync
Before moving forward, it’s important to preview the entire video to ensure that both the voice-over and scenes are perfectly in sync. If any of the scenes are out of sync, you can adjust them by extending the time in the end or adding more time to the asset’s animation duration.
Add Audio Track: Enhancing the Experience
Another great addition to our micro-video is background music. We have a wide selection of audio tracks to choose from in the Sounds panel. In addition to background music, we also have sound effects available. You can also import your own audio track to use in your video.
Trim Your Track:
Perfecting Timing
If the audio track is longer than your video, you can trim the ending portion to match the video’s timing. You can also remove any dead air at the beginning of the track so the music starts immediately when the video is played.
Fade Out Effect:
Seamless Ending
Don’t forget to apply the “fade out” effect at the end of the track to ensure the music doesn’t end abruptly.
Volume: Balancing Sound
Lastly, lower the volume of your audio track so it doesn’t overpower your voice-over.
Pan & Zoom:Highlighting Important Portions
The pan & zoom effect is a great way to highlight important portions of your scene. It directs the viewers’ eyes to where you want them to look without directly telling them. Here’s how to set up the pan & zoom effect in our sample video:
A. Locate the pan & zoom feature in the timeline and click the “+” sign to launch the menu.
B. Drag and move the effect to where you want it to start playing in your scene.
C. Click fx to launch the pan & zoom settings. Adjust the camera to focus on the materials used for the recipe.
D. Preview the video and adjust the pan & zoom timing on the timeline for the perfect effect. Make sure to zoom out to reveal the whole screen again.
E. Repeat the process for other scenes, placing the pan & zoom effects strategically to highlight important elements.
Conclusion: Micro-Videos Are Effective
Micro-videos are a great way to teach skills or concepts in a short and snappy format. They easily grab viewers’ attention and are entertaining. Doodly is a fantastic tool for creating micro-videos, and we hope our walkthrough inspires you to create your own. Don’t forget to share your videos with us on our FB Doodly page. Happy doodling!


