
Free
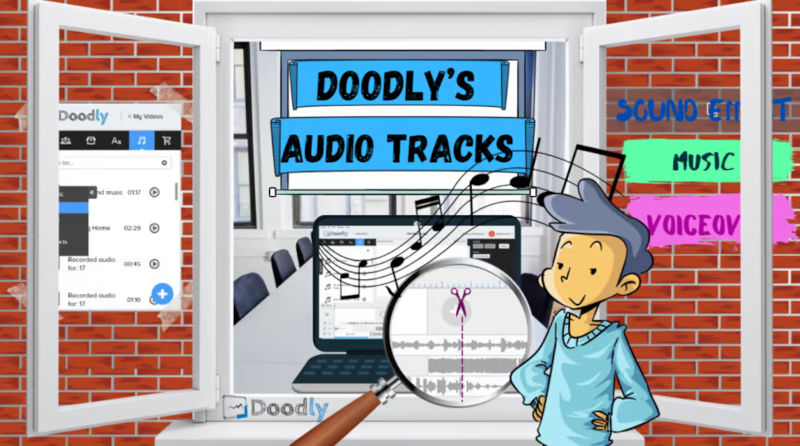
Doodly’s Audio Tracks
Did you know that the audio tracks in your videos are just as important as the visuals? They grab your audience’s attention, make your presentation lively, and help them remember your message. In today’s blog, we’ll dive into the audio feature of Doodly.
Using audio in Doodly can be a bit confusing, especially if you’re new to it. How do you add background music? Can you edit a voiceover? Can you crossfade tracks? And where do you place sound effects? We’ll answer all these questions and more!
There are three audio tracks commonly used in videos: background music, voiceover, and sound effects. Background music sets the mood, voiceover narrates the story, and sound effects bring educational videos to life. Luckily, Doodly supports all three! Let’s start by exploring the voiceover track.
Customize Your Voiceover Track with Scene Settings
Before recording your voiceover, you’ll need to set up a few things in the scene settings. Here’s what you need to do:
1. Exit Animation:
Decide if you want transitions between scenes. For short story videos like the one we’re creating, it’s best to keep it clean and turn off the transition.
2. Extra Time At The End:
Give yourself enough time to read the subtitles. By default, you have 0.05 seconds, but you can adjust it based on your script. In our sample video, let’s make it 3 seconds.
3. Subtitle:
Did you know you can use the subtitle field to input your script for the voiceover? As the video plays, you can follow along and read your script. Once you’re comfortable with the timing, you can play the video without subtitles.
4. Apply:
Don’t forget to save your changes by hitting the Apply button.
Recording Your Voiceover Made Easy
Now that your scene settings are ready, let’s record your voiceover! Follow these steps:
1. In Doodly’s timeline, find the mic icon and click the plus sign. This will display a red mic that you’ll use to record your voice.
2. Next to the red mic, you’ll see the default time set at 00:00, indicating that your recording hasn’t started. When you’re ready, hit the red mic icon.
3. The scene will play along with the subtitles you set in the scene settings. Start reading your script as soon as it appears on the screen. Remember to maintain a good pace, neither rushing nor reading too slowly.
Sometimes, you may experience video playback issues due to a slow internet connection. In our sample video, you’ll notice a delay in the appearance of the subtitle, causing the reading to extend into the next scene. In such cases, you’ll need to adjust the timing to match the video.
Fine-Tune Your Voiceover for Perfect Timing
To adjust your voiceover timing, follow these steps:
1. Position your cursor in the middle of the voiceover recording on the timeline. Click and hold your mouse or trackpad.
2. Move the audio track to the left and position it in the middle. This is just a preliminary adjustment; we’ll preview it to ensure the timing is correct. If needed, you can make further adjustments.
Editing Your Voiceover:
Make Your Video Sound Perfect
Before you finalize your video, it’s important to preview your work and make some adjustments. In this guide, we’ll show you how to sync your voiceover, trim audio, and even remove unwanted portions. Let’s get started!
Step 3: Syncing Your Voiceover
When previewing your video, you may notice that the voiceover starts a bit late. We want the voiceover to match the animation, so let’s sync it up!
Step 4: Trimming the Audio
Sometimes, there may be extra empty space at the beginning of your voiceover. Don’t worry, we can easily trim it!
Step 5: Trimming Made Easy
To trim your audio, simply hover over the beginning of the track and click and drag it. This will help you remove any unwanted parts.
Step 6: Adjusting the Duration
After trimming the audio, we’ll focus on the ending part. Let’s make sure it flows smoothly with the video.
Step 7: Fine-tuning the Scene
To adjust the duration, we’ll change the extra time at the end to .05 seconds. This will give your video a polished feel.
Editing Your Voiceover:
Customize and Enhance
Recording your voiceover is just the beginning. Now, let’s take a look at how you can further improve and customize your audio.
Step 1: Recording and Saving
Every time you record your voice, it’s automatically saved in the Sounds tab. You can find your most recent recordings under Sounds > My Library.
Step 2: Avoid Confusion – Rename Your Voiceover
To avoid confusion, it’s best to rename your voiceover right after recording. This will help you easily identify different recordings for your video.
Step 3: Removing Unwanted Portions
Sometimes, you may need to remove certain parts from your voiceover. Let’s see how you can easily do that.
Step 4: Trimming the Middle Portion
If there’s a part in the middle of your recording that you want to remove, we’ve got you covered. Here’s a simple step-by-step guide.
Step 5: Closing the Gap
After removing the middle portion, there will be a gap in the audio track. We’ll show you how to close that gap seamlessly.
Adding Background Music:
Elevate Your Video Experience
Now that your voiceover is perfect, it’s time to add some background music to enhance your video.
Import Your Own Audio File
You have the option to import your own background music or use our preset tracks. Here’s how you can import your own audio file easily.
Adjusting the Volume
To ensure your audience hears your message clearly, it’s important to balance the volume of your voiceover and background music. We’ll guide you through setting the perfect volume levels.
Adding Fade In and Fade Out Effects
To give your video a professional touch, you can add a fade-in effect at the beginning and a fade-out effect at the end of your audio track. Here’s how you can do it effortlessly.
Introducing Preset Tracks: Music and Sound effects!
Don’t forget to check out the Sounds tab for our collection of preset tracks. These tracks are conveniently organized in alphabetical order, featuring a mix of music, sound effects, and even your own imported audios.
If you prefer to browse specifically for background music or sound effects, simply head over to Categories and select your desired audio type.
The best part? You can mix and match music, sound effects, and voiceover all in your Doodly video. Feel free to add multiple audio files to your timeline for an even more engaging experience. That’s what makes Doodly so much fun!
Stay tuned for more exciting features and enjoy creating your own whiteboard animation videos with us.
Posted in Features, Whiteboard Animation, Whiteboard Animation Software, Whiteboard Animation Videos


