
Free
How to Turn Your Doodly Video Into a Facebook Reel
Looking to make your short videos stand out on social media? Facebook’s Reels is the answer! Launched by Meta (formerly known as Facebook), Reels is the perfect tool for content creators and video enthusiasts. Not only does it help increase your followers, but you can also get paid for your videos through monetization.
Available on both Android and iOS, Facebook Reels offers a range of exciting features to enhance your videos. Let’s explore some of the key features and learn how to use our Doodly videos as Facebook Reels.
Music
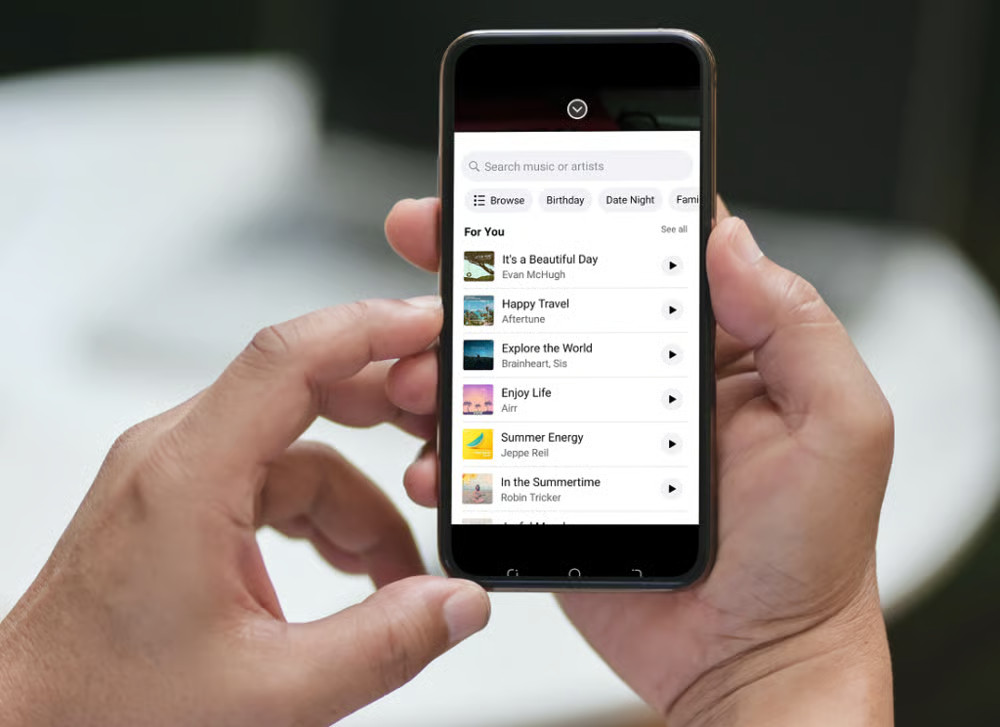
Facebook’s vast library of music tracks is categorized based on occasion, genre, and emotion. Whether you’re looking for the latest hits or timeless classics, Facebook has got you covered. You can even search for specific songs and select sections of the track to use in your video – no need to stick to the beginning!
Length
When it comes to video length, Facebook Reels gives you the option to upload or create videos that are 15, 30, or 60 seconds long. If your video exceeds 1 minute, don’t worry! You’ll receive a friendly reminder to trim it down. But if you want to include everything, try speeding up your video to fit within the 60-second limit.
Speed
Adjusting the speed of your video is easy with Facebook Reels. Whether you want to slow things down or speed things up, you can customize the speed right after selecting your video from your gallery.
Effects
Make your videos pop with Facebook Reels’ variety of effects. From sparkles to filters, you can apply these effects to give your video that extra wow factor. Plus, you can save your favorite effects for easy access in future recordings.
Timer
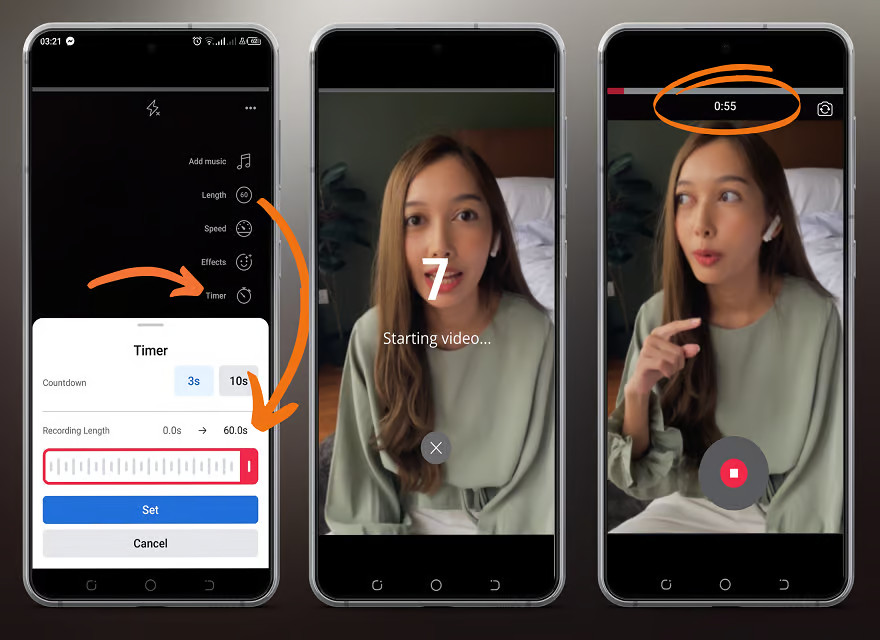
No more awkwardly fumbling with the record button! Facebook Reels offers a countdown timer of 3 or 10 seconds, allowing you to prepare before the camera starts rolling. It’s perfect for ensuring smooth, professional videos without any accidental hand captures.
Green Screen
Get creative with the green screen feature! You can upload your own background image or video, or choose from a selection of presets. This is ideal for adding a custom touch to your videos, making them perfect for movie reviews, teaching, or simply showcasing your personal style.
Creating a Plan for Your Awesome Reel Video
Before you hit that record button, let’s talk about planning. We all want our videos to be a hit, right? So, here’s how you can make sure your reel video stands out.
1. Pick the Perfect Song
Choosing the right background music sets the mood for your video. Whether you’re promoting your products or just trying to attract more followers, go for a catchy, lively song that’s easy on the ears. You can browse the options or search for a specific song.
2. Get Creative with the Green Screen Effect
The green screen effect gives you endless possibilities. It adds an interactive vibe to your video and makes it more fun to watch. So, think about how you’ll enter the screen, plan your spiel, or decide on the movements you want to make while recording.
3. Add Some Pizzazz
Once you’ve finished recording, you can take your video to the next level with some cool effects. Spice it up with texts, stickers, gifs, and other video effects. You can even trim, speed up, or slow down your video, change the background music, and more.
Now, let’s dive into using Doodly for your Facebook reel video.
Perfect Your Doodly Clip for Facebook Reel
To make your video pop, follow these steps:
1. Go Vertical
For a Facebook reel, your video should be vertical. Set your Doodly video resolution to Custom and choose the width as 1080 and height as 1920.
2. Choose the Right Board Style
Select the board style that suits your theme the best. You can go for a whiteboard, chalkboard, glassboard, or even create a custom style.
3. Give Your Video a Captivating Title
Don’t forget to add a catchy title to your video. Consider numbering your reels or adding a date for a series. You can set the title while choosing the video resolution or edit it later.
4. Characters & Props
Now it’s time to get creative! Add your assets to bring your video to life. You can use the built-in assets in Doodly or find royalty-free images and props from sites like pixabay and freepik.
5. Adjust the Timing
Remember, Facebook reel allows only 60 seconds of video. So, trim your video or capture the highlights within this time. Also, make sure to adjust the duration of each asset in your video for a perfect flow.
6. Choose Your Hand Style
Customize your video by selecting your preferred hand style. You can go for a cartoon effect or use a real hand. Left-handed or right-handed, it’s up to you.
7. Export Your Masterpiece
Once you’re satisfied with your video, it’s time to export it. You can also choose where to save the exported video if needed.
Importing Doodly Video to Your Phone
Since Facebook reel is available on mobile only, we need to transfer your Doodly video to your phone. Here’s the easiest method:
For iOS Users
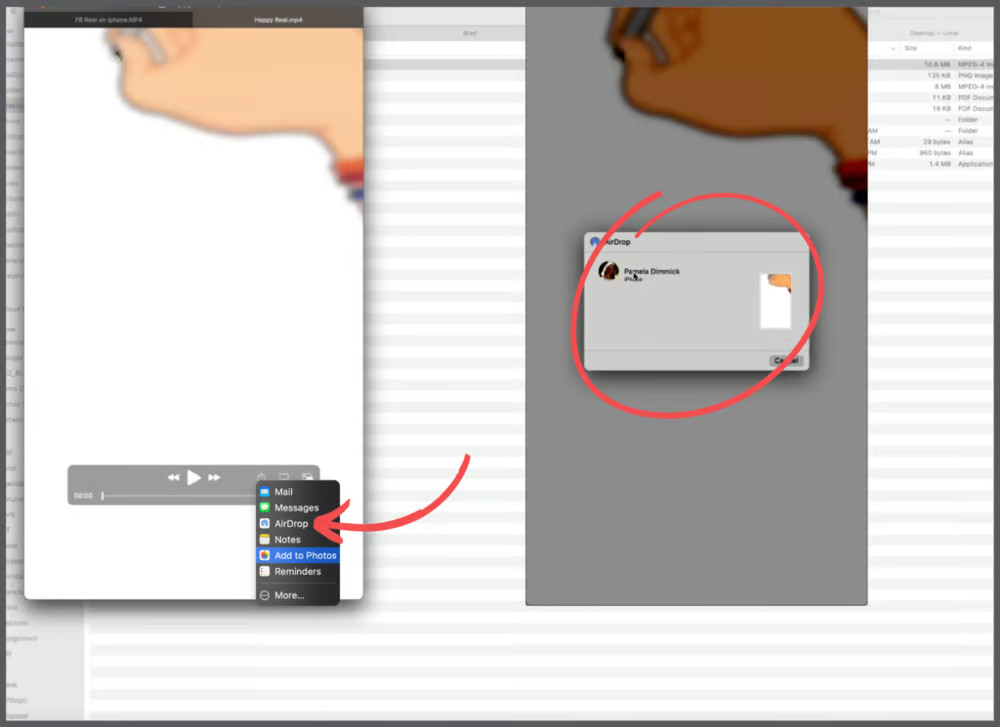
Use the airdrop app to transfer files from your Mac to iPhone. Open your Doodly video using Quicktime on your Mac, click the share icon, and select airdrop. Choose your iPhone’s name when prompted, and accept the airdrop notification on your iPhone. Easy peasy!
Hey there! Are you an Android user looking to transfer a video from your computer to your phone? Well, we’ve got you covered! You can easily do it using ShareIt. First, make sure you have ShareIt installed on both your devices. Then, open the ShareIt app on your mobile phone and PC. Make sure they’re connected to the same network.
On your phone, tap the “+” sign on the ShareIt app and select “Connect to PC.” Your phone should detect the laptop with ShareIt. On the PC, you’ll receive a notification to accept the connection request. Click “Accept” and you’re good to go!
Once connected, select the File folder in ShareIt on your PC, find the Doodly video and transfer it to your phone. The file will be saved on your phone. Just remember to move it to your Camera roll for easy access when you’re ready to upload it to Facebook.
Now that you have the Doodly video saved on your phone, let’s upload it on Facebook! Here’s a step-by-step guide:
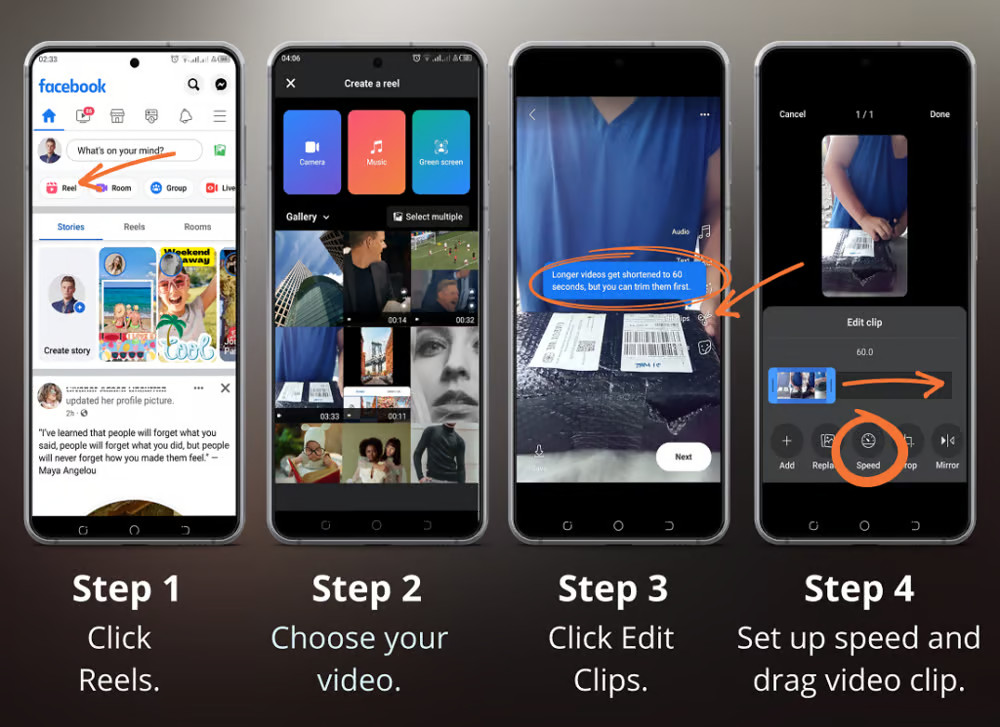
1. Tap on “reel” from your Facebook account and choose the imported Doodly video.
2. After selecting the video, you can add some awesome features like music, effects, texts, gifs, and more. Once you’re happy with your creation, hit “next” and then “Share reel.”
And guess what? You can even use the green screen effect and use your Doodly video as a background while recording your own video. How cool is that? Check out some sample videos on Facebook reels for inspiration.
We hope you enjoy this walkthrough! It’s time to unleash your creativity with Doodly and create amazing Facebook reels. Whether you want to promote your products and services or just have some fun, remember to enjoy the process of Doodling. Happy creating! 😊


