Free
How To Create Your FIRST Doodly Video
Hey there! Welcome to Doodly, where we’ll guide you through creating your very first Doodly video.
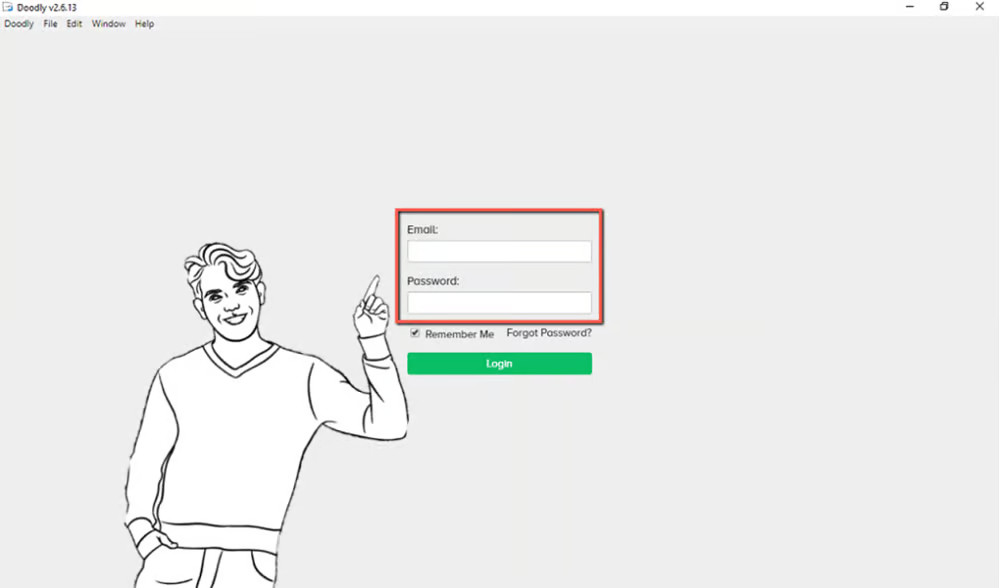
To get started, let’s log in to your Doodly account.
Once you’re in, head to the top left-side of your dashboard and click on the “Create New Video” menu.
A new screen will pop up, offering you the chance to choose your preferred board style, add an attention-grabbing title, and select the resolution that suits you best.
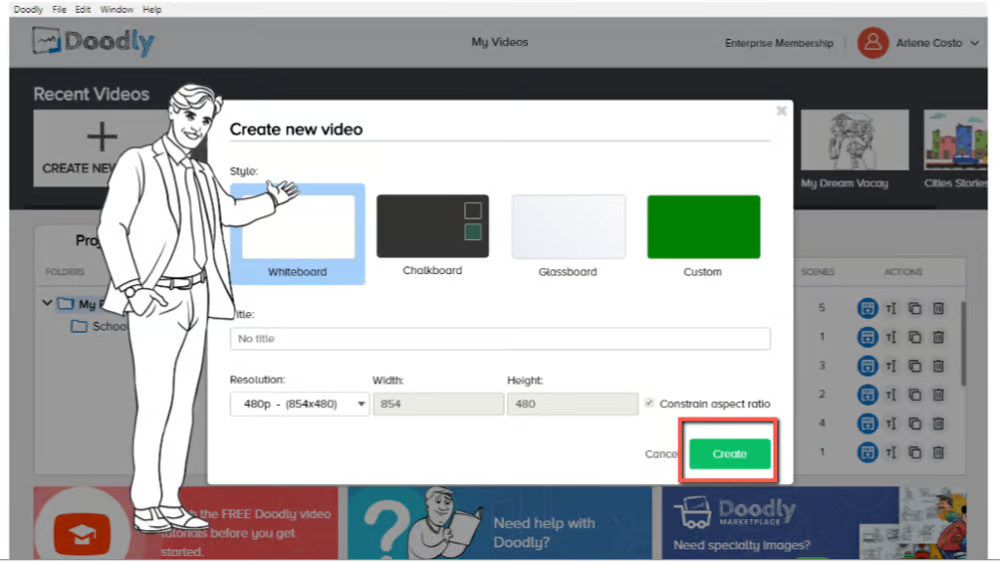
You can also adjust the resolution in the Video Settings or right before exporting your video.
Let’s dive in and bring your ideas to life with Doodly!
Great job! Now, it’s time to get creative and bring your ideas to life. Just hit the “Create” button when you’re done.
Welcome to the main Doodly interface. Here, you’ll find a blank canvas, waiting for you to unleash your creativity.
Let’s dive into creating a fantastic beach scenario together. To get started, head over to the Assets Panel and click on “Scenes”.
Now, let’s search for a ready-made beach scene. These pre-designed scenes are perfect because they provide a solid foundation for your video. It’s like having a starting point that’s already filled with awesome beach elements.
I’ve found an amazing beach scene for us to use! It’s got everything you’d want – cozy beach chairs, swaying coconut trees, and a beautiful wide-angle shot of the beach. And to make it even more lively and fun, there’s a little girl flying a kite!
But now I want to really capture the bustling energy of a crowded beach. So, let’s bring in some kids running around and other people having a blast under the warm sun. It’ll be a perfect depiction of a happy, vibrant beach day!
Note: The number of assets available in your Assets Panel may vary depending on your Doodly version.
One of the best features of premade scenes is that you have full control over each object. You can move them around and adjust their size individually.
The great thing is, deleting an object won’t affect any other objects in your video.
But that’s not all! There are four other useful functions: flip, bring forward, send backward, and delete. These are commonly used when editing videos.
Copying an object is easy. You can either right-click with your mouse or use the keyboard’s copy-paste function.
Layers can be found within the actions panel.
Each object in the Layers Menu has its own duration and delay.
By default, each object has a zero delay and lasts for 3 seconds. This means that each object will appear immediately after the previous one, with no delay. It takes 3 seconds for each object to be hand-drawn.
- If you want to adjust the timing to match your voice-over, simply change the duration.
- And if you want an object to appear after you’ve said something, just adjust the delay timing.
- The order in which objects appear in your video is determined by their arrangement in the Layers Menu.
- If you don’t want an object to be hand-drawn, you can set its duration to zero.
- As you decrease the duration, you’ll notice that the Scene in your timeline also shrinks.
Alright, let’s get started on creating your very first Doodly video! We’re super excited for you to dive in and have some fun with it. Enjoy the process!