Free
How To Animate a Face in Doodly
Want to bring some life to your Doodly videos by animating a face? This article is your guide! Learn how to add silly facial expressions and movement to your Doodly characters, making your explainer videos a hit. To get started, we’ll show you how to choose the right assets and import them into Doodly. Then, we’ll walk you through creating animated facial expressions step-by-step. Let’s dive in!
Choosing Your Images
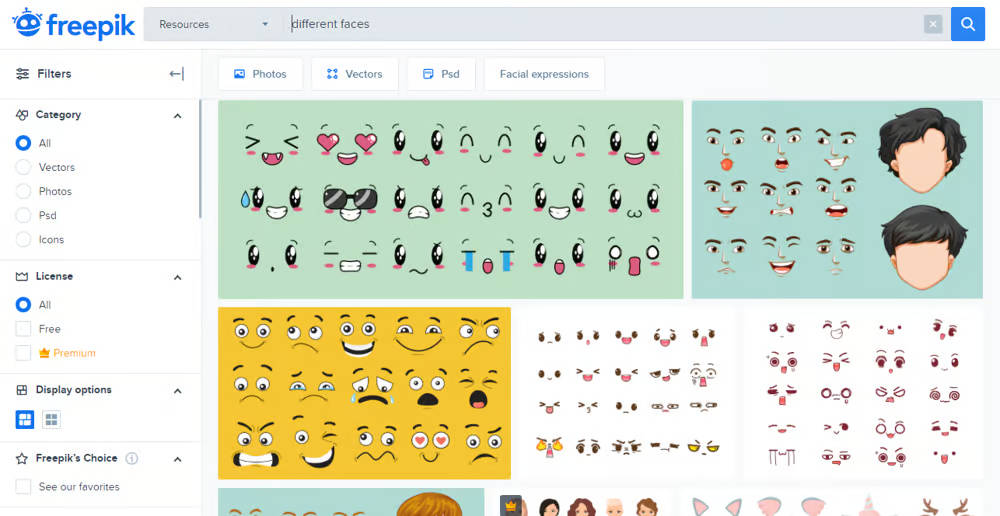
To create our animation, we need two images: a head without a face and several facial expressions. Head over to a website like freepik.com or pixabay.com, and find the images that best suit your video. Download these images to your computer.
Importing Images To Doodly
Open Doodly and select “Props” from the assets menu. Click the blue “+” sign at the bottom of the Assets panel, and browse for the downloaded images from your computer. It’s helpful to rename each image for easy reference in Doodly.
Creating Animated Facial Expressions
Now that we have the assets imported, let’s start animating our facial expressions!
Step 1: Choose an image
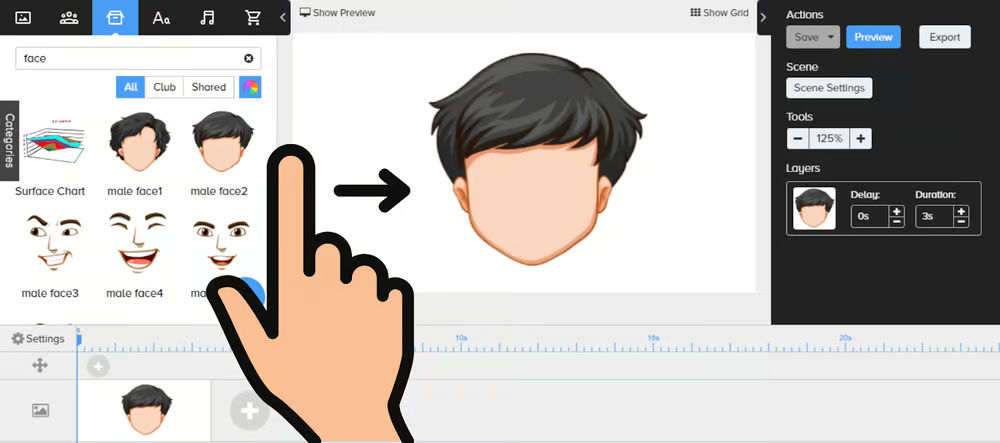
Select one of the head images without a face and add it to your scene.
Step 2: Add a facial expression
Drag and drop a facial expression onto the faceless head. Choose a funny, random expression that fits your scene. Adjust the size of the facial expression to match the face.
Step 3: Adjust settings
Go to Video settings and change the scene transition to None or “X,” and turn off the erase mode. Save your changes.
Step 4: Set animation duration

In the Layers menu, set the animation duration of the face to zero seconds. This way, the facial expression will be drawn by hand, giving it a unique touch. Set the duration to about 3 seconds.
Step 5: Duplicate the scene
Right-click on the timeline, select the previous scene, and choose “Duplicate after.” This will create a new scene with the same facial expression.
Step 6: Add a new facial expression
Locate and drag a new facial expression onto the new scene.
Step 7: Overlap and adjust

Position the new facial expression on top of the previous one to maintain consistent eye, mouth, and nose placement. Make any necessary adjustments, and delete the previous facial expression from the layers menu.
Note: Keep the “bare face” in the exact location for each scene, without any movement. This is crucial for a smooth animation effect.
Step 8: Make the animation duration zero.
Now, let’s change the animation duration of the new facial expression we just added to zero.
Step 9: Repeat steps 5-8.
Keep repeating steps 5-8 until you’ve added all the facial expressions you want. Simply duplicate the previous scene, add the new expression, and set the animation duration to zero. If you want the animation to last longer, you can duplicate your scenes and place them at the end of the timeline.
Adding a Draw Path
By default, imported assets are scribbled diagonally. However, we want our facial expression to be accurately drawn, so we’ll add our own draw path. This step is only necessary for the first scene. To do this, select the facial expression and click on the pencil icon to open the Edit Asset screen.
To start adding the draw path, click on “New Path” and plot dots to follow the lines in your image. Feel free to zoom in for a better view.
Don’t worry if your paths aren’t perfect – the drawing animation is usually very short. Just make sure to save your changes when you’re done.
With a Draw Path vs Without a Draw Path
Now, let’s take a look at our video:
If you want to add some movement to the head, you can select both images in your scene and rotate them slightly, alternating directions for each scene. Check out our sample video for inspiration.
That’s all for today! We hope this tutorial has inspired you to create your own animations in Doodly. Remember to tag us when you share your videos on Facebook. See you next time!


