
Free
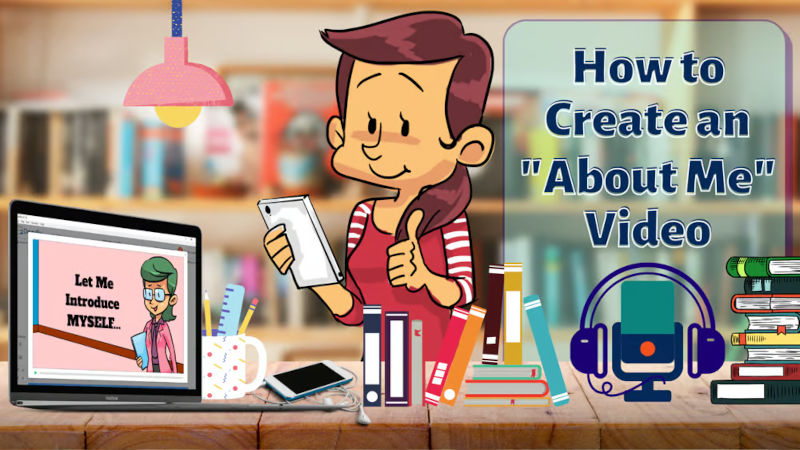
How to Create an About Me Video
When it comes to job applications, a strong resumé, education, and experience aren’t always enough to stand out. If you want to give yourself an edge, consider creating a self-introductory video.
Having your own video introduction immediately creates a personal connection. Let’s face it, watching a video is much more engaging than reading a stack of resumes. But talking about yourself on camera can be intimidating. Some people are camera shy, others don’t like being recorded, and some simply don’t have the time to prepare. And even if you can create a video, it can be challenging to make it look professional without the right equipment, such as an HD camera and noise-cancellation microphone, or a sound-proof area.
That’s where Doodly comes in. With Doodly, you can create an introduction video without actually appearing in the video. And the best part? It’s fun and unique. You can choose your own character, set your own background, and unleash your creativity.
So, what exactly is an About Me video?
An About Me video is a way to introduce yourself to customers or employers. It allows them to get to know you better and gives them a taste of what it would be like to work with you. These videos are commonly used when submitting job applications to provide information about yourself. But they can also be used to warm up clients before a meeting, whether it’s over the phone or in person.
When creating an About Me video, it’s important to consider what information you want to include. The details will depend on how you plan to use the video. Is it to promote yourself or your business? Let’s take a look at what should be included in your video.
1. Brief background:
Start by introducing yourself with your name and title, and give a short description of what you do. Keep it simple and relatable. If you’re a business founder, explain why you started your business and its core values and mission.
2. Problem-solving:
Highlight problems or challenges you’ve successfully tackled in your previous work. Showcase your specialized services and strengths. Give potential clients a reason to hire you and back up your skills with real-life examples.
3. Call to action:
Finally, include a call to action that prompts viewers to take action. This could be a link to learn more about you or contact you, or your social media links for further engagement.
We’ve provided a sample script for an About Me video using a table to conceptualize the scenes and voiceover. Planning your video with a draft can help ensure a smooth flow and make it easy to revise and update before creating it in Doodly.
Now let’s dive into creating our Doodly video. We’ll gather the assets we need, such as a background room and the character of Agatha, and implement our video flow. Remember, when selecting a character, make sure they have all the gestures you need for your concept.
Scene 1
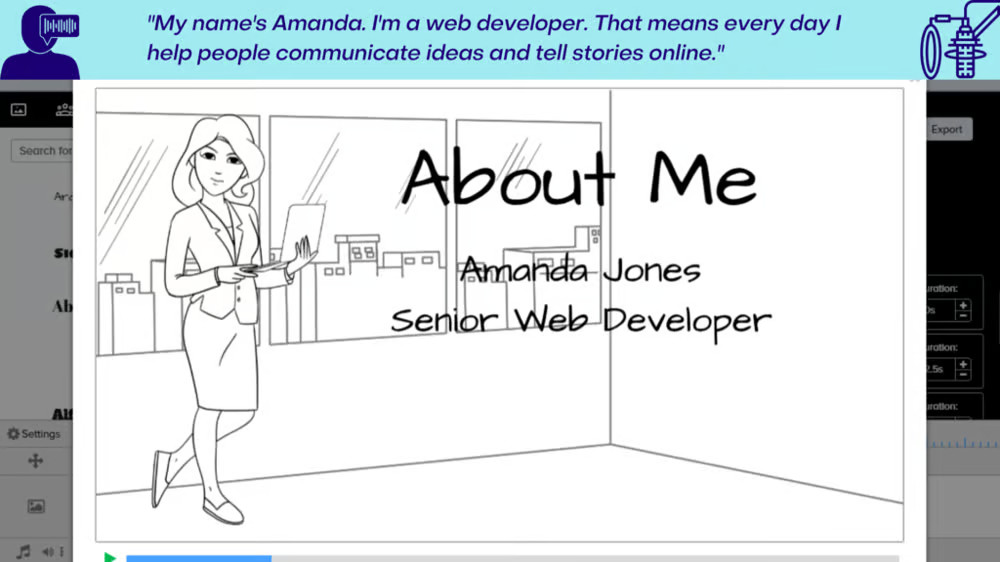
Welcome to scene 1! Meet Amanda Jones, a professional with a laptop, dressed in business attire in her office. The title of the video, “About Me,” lets you know right away that this is her self-introduction video. Amanda’s name and current role are displayed, and in her voiceover, she explains her work in simple, easy-to-understand terms. Don’t worry if you’re not familiar with her field – she makes it intriguing and interesting for everyone.
Scene 2
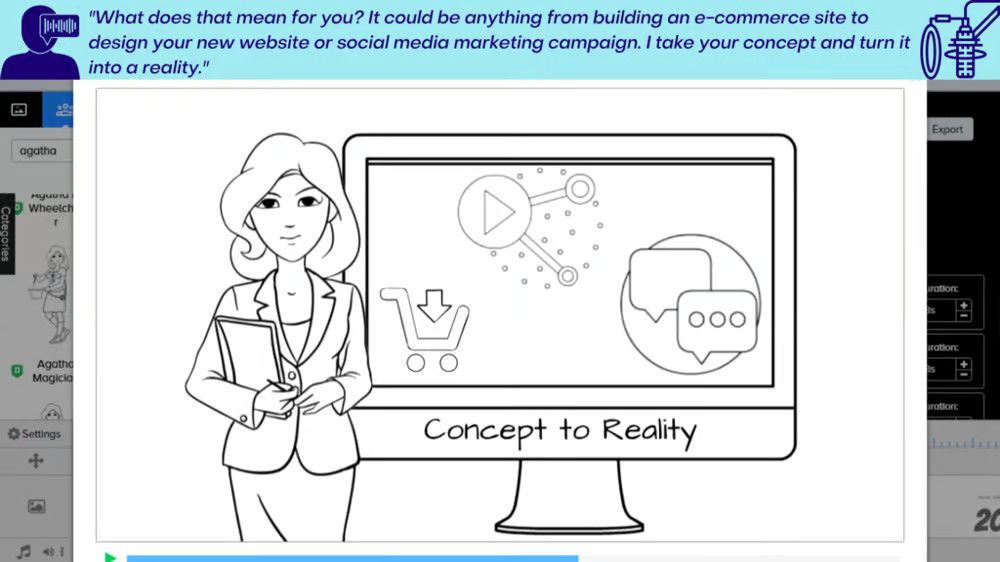
Now, let’s dive into scene 2. Here, you’ll see Amanda facing the camera, holding a folder, with a desktop filled with e-commerce symbols behind her. In her voiceover, she provides a more detailed description of what she does. She starts by asking, “What does that mean for you?” – addressing the simple work description from the previous scene. She also uses a catchy tagline, “Concept to Reality,” which sticks with you long after the video ends.
Scene 3
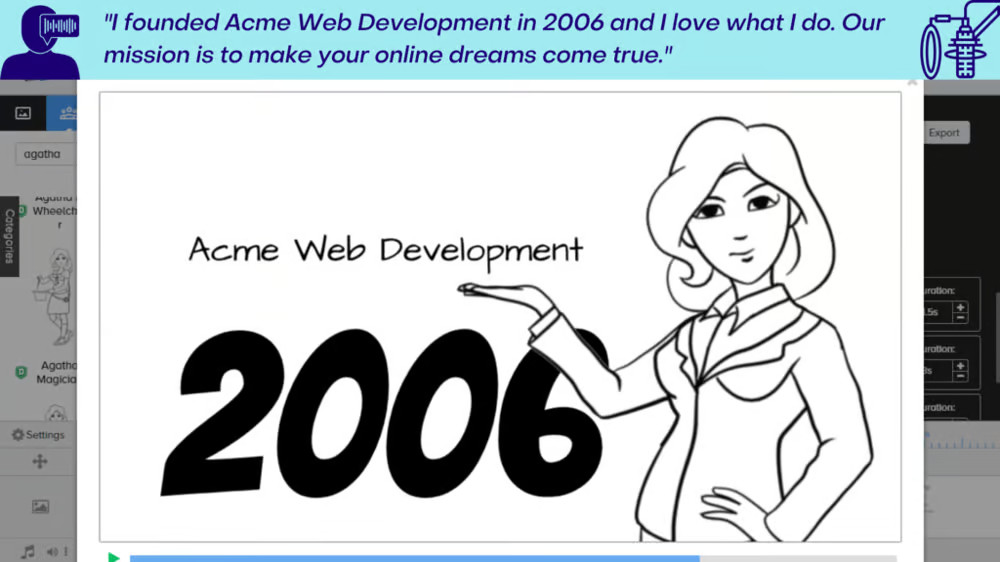
Get ready for scene 3! Amanda emphasizes her business name with a hand gesture. We zoom in on her upper body to bring focus to her business name. The year she founded her company, 2006, appears larger than the company name, showcasing her extensive experience in the field. Her voiceover also includes her company’s mission.
Scene 4
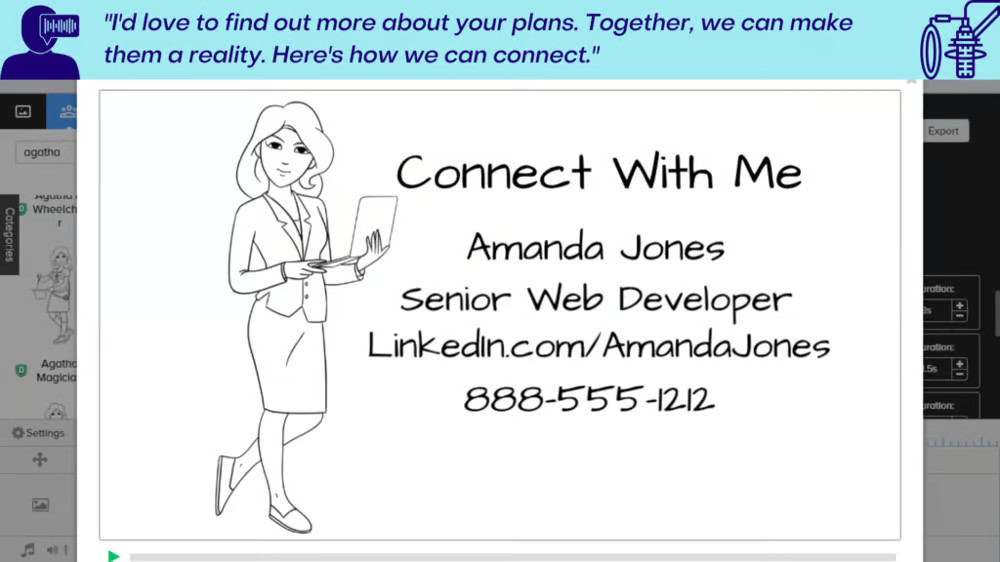
In the final scene, we have our call to action (CTA). After impressing you with her credentials, Amanda wants you to take action and reach out to her. She stands beside her contact details, ready to connect. Feel free to contact her via email or connect on social media. Her voiceover is proactive, friendly, and shows genuine interest in connecting with you.
Voiceover Recording
Now, let’s talk about recording the voiceover for our “About Me” video.
Unlike other processes, we don’t have to create all the scenes before recording the voiceover. We can take it step by step. After adding assets to the first scene, we start recording the voiceover for that specific scene. To do this, simply locate the record option within the timeline and click the plus (+) sign.
Clicking the plus sign reveals a red mic icon with a 00:00 time display. Hit the red mic icon and start recording your script.
Remember to remove any extra space or dead air at the beginning of your recording. Hover your cursor at the start of the voiceover, wait for the double-sided arrow to appear, then drag your cursor to the right.
We intentionally leave a brief pause at the start of the voiceover to give the audience time to settle and focus on the presentation. It creates a smoother flow, rather than immediately launching into the content as soon as the video starts.
Timing is crucial – ensure that your voiceover matches the scene’s timing. If needed, you can adjust the animation duration of each asset or limit the scene’s time at the end. It doesn’t have to be exact, but it should be close enough for a seamless transition.
Now, let’s go over some other important features in Doodly that often go unnoticed, but can greatly enhance your video.
Extra Time At The End
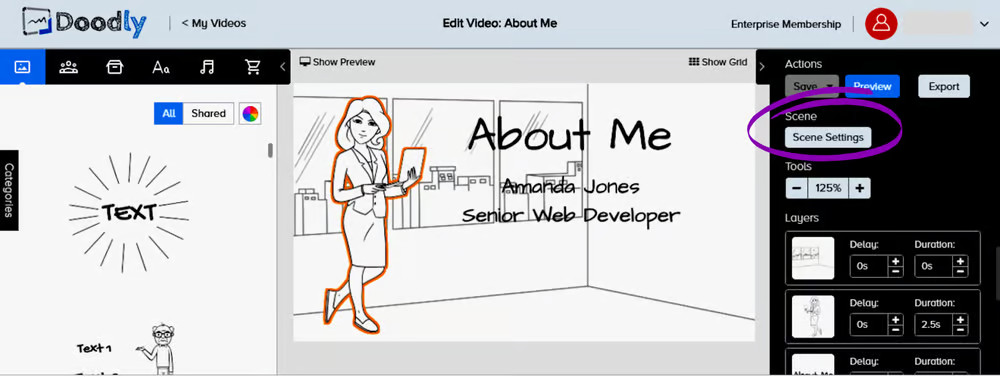
Doodly provides the option to adjust the timing of your scene and audio tracks with the “extra time at the end” setting. By default, each scene ends at .05 seconds, but if your voiceover is longer, that may not be enough. You can extend the “extra time at the end” menu in the Scene Settings to fully capture everything. You can also adjust this setting before recording your voiceover if your scene script is lengthy.
Exit Animation
Another menu in the scene settings to keep in mind is the exit animation. This determines how your scene transitions to the next. For a clean, seamless transition, it’s often best to choose “X” or none as the animation style.
And there you have it! By following these tips, you’ll create a captivating “About Me” video that engages and connects with your audience.
Introducing the Exit Animation
When it comes to the scene settings in your video, don’t forget about the exit animation. This feature adds a stylish transition between scenes, ensuring a smooth viewing experience.
Find the Perfect Volume
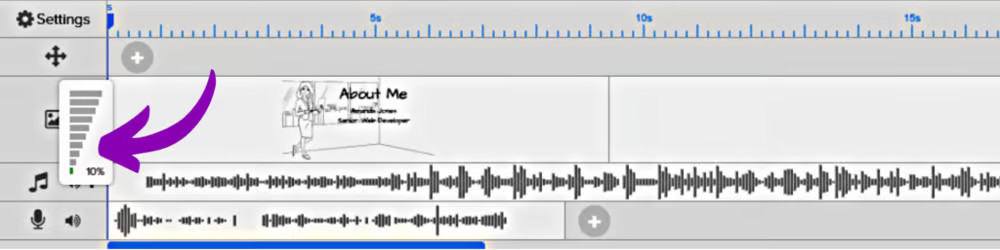
If you’re planning to include background music in your About Me video, it’s important to get the volume just right. You don’t want the music to overpower your voiceover. Aim for a volume level of 6% to 12% – this creates a pleasant audio balance that’s easy on the ears. Of course, if you don’t have a voiceover, feel free to adjust the music volume to your preferences.
The Power of an About Me Video
An About Me video is a powerful tool for connecting with your future employer or co-workers. It instantly builds rapport and trust. By sharing why you’re passionate about your work, you show your commitment and dedication.
Create Your Self Introduction with Doodly
Making your own About Me video with Doodly is a breeze. It’s a fun and easy way to showcase your personality and skills. Let this blog inspire you to get started on your own self introduction video. Until next time, happy creating! 🙂


