Reviews
Elementor Theme Builder Tutorial: Build A Beautiful Custom WordPress Theme With Zero Coding
Elementor Theme Builder Tutorial: Ever spent hours searching for the perfect WordPress theme only to be disappointed by the end result?
Yeah, we’ve all been there.
Fortunately, with the rise of page builders in recent years, a select few have developed into fully-fledged *theme* builders that aim to eliminate those ThemeForest binges forever.
For many, Elementor is considered one of the most promising theme builders to emerge, and as a paid user of Elementor Pro you will get access to what I believe is the best WordPress theme builder on the market right now.
In this Elementor theme builder tutorial, I’ll walk you through the different aspects of this theme builder and how you can use it to build the ultimate custom WordPress theme with zero coding knowledge.

Here’s what I will be covering in this guide:
- What Is A Theme Builder & How Does It Work?
- Building Your Theme with Elementor
- Building Header & Footer Templates
- Building An Archive Template
- Building A Single Post Template
- Building Your 404 Page
- Building E-Commerce Theme Pages
- Final Thoughts
What Is A Theme Builder & How Does It Work?
Well, a page builder is a flexible design tool that give you complete visual control over the page (or post) you’re creating.
The issue with page builders, however, is that the content on the page is primarily static, meaning it never changes.
Static content is exactly what you want when building pages you expect to stay the same, like Home Pages, About pages, or even Landing Pages.

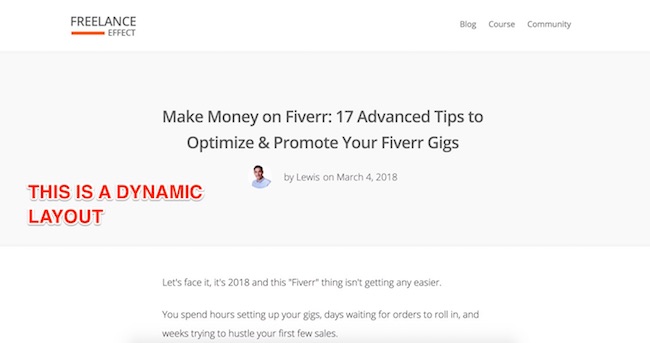
A theme builder, on the other hand, allows you to build dynamic layouts where most of the content within that layout changes. You can almost think of a dynamic layout as a container that fills with information, and while the information changes, the container is fixed.
These are incredibly useful for building things like blog archives, or post layouts, which are also called single post layouts.
The overarching benefit of using dynamic layouts is that you can effectively have a single design that governs multiple pages, which is exactly the same benefit you get from using a WordPress theme.
The thing is, once you understand how this works and how much control you get over the appearance of your site by using Elementor’s theme builder, you will never, ever go back to the old way of customizing your WordPress theme.
So let’s start with the three core components that make up Elementor’s theme builder. Don’t worry, it’s easier to wrap your head around than you think.
Component #1: Theme Templates
If you’ve used Elementor previously then you’ll already be familiar with content and section templates, which allow you to reuse elements or entire sections without having to recreate them.
After upgrading to Elementor Pro to unlock the theme builder, you’ll notice some shiny new template options that are theme-specific:
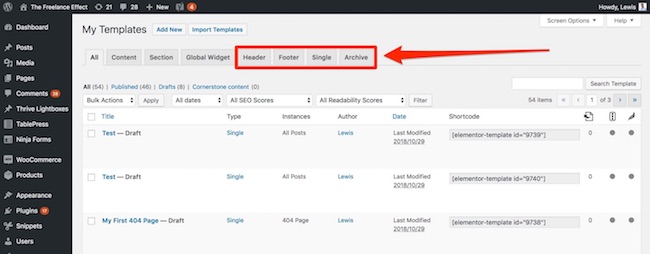
- Header: The top section of your website that typically includes your logo, navigation links, and potentially social icons or a search bar.
- Footer: The bottom section of your website that typically includes copyright information, additional links, and potentially a disclaimer or other legal copy.
- Single: This would either be a post page, media page, 404 page or the layout of your blog post, including information such as the title, featured image, date, category, comment area, share buttons and more.
- Archive: A list or grid of your latest posts, or posts in a specific category, date, tag or other WordPress taxonomy.
When building your theme, Elementor will ask which one of these templates you want to use before launching you into the familiar editor.
The question you might have is, how are they any different to the previous template options?
Well, the key difference is that they’re able to override areas of your theme that are otherwise untouchable by the WordPress editor, or any page builder for that matter.
For example, you don’t insert a header like you would with a content or section template because a header always shows at the top of every page.
So, by selecting the header template, Elementor knows to inject the contents of that template above all other content on your site.
In other words, the theme template dictates how and where it shows on your site, and each template is very different in that regard.
And that brings us on to…
Component #2: Dynamic Widgets
Elementor’s widget library offers one of the most complete selections of any page builder today, even without the plethora of free and paid third-party addons.
Before their WordPress theme builder came along, the basic widgets included things like text, headings, buttons, images, videos, icons and more.
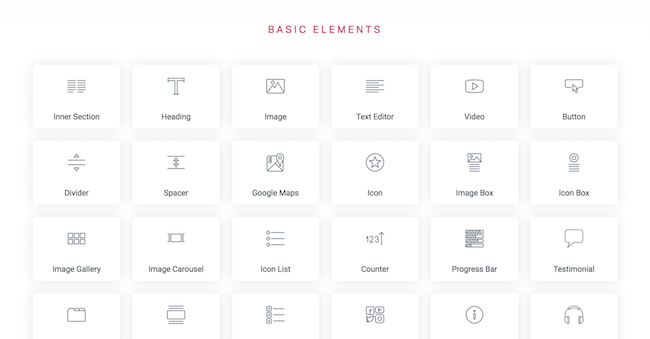
As useful as these were (and still are), they don’t offer the dynamic capabilities needed to create fluid layouts since the content created by those widgets is static — meaning it doesn’t change.
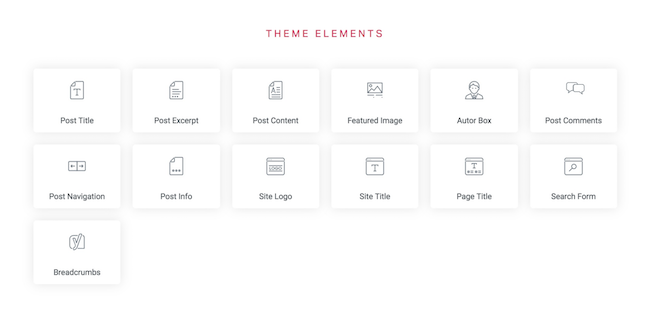
In order to create dynamic layouts, you need dynamic widgets. Elementor calls these “Theme Elements”:
Confused? Let me explain with an example…
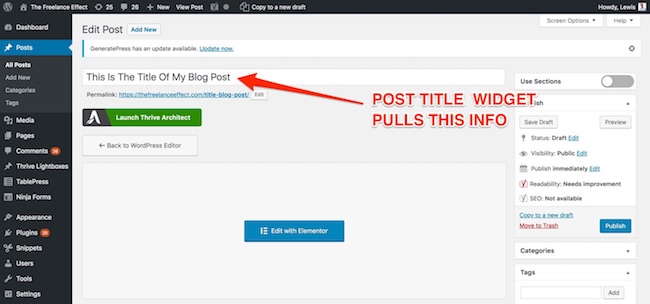
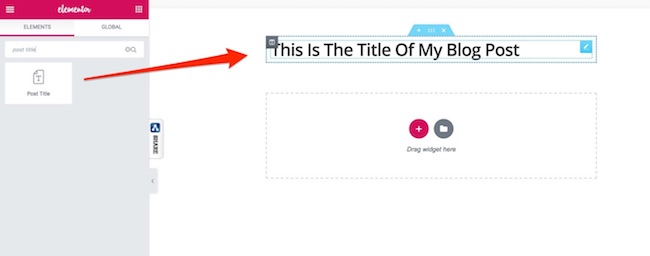
Dragging a Post Title widget onto a page doesn’t give you an editable text field like you’d expect with a regular Heading widget.
Instead, it automatically populates with a title:

This is happening because Elementor pulls the post title directly from the post itself, a value I can set outside of the Elementor editor.
In other words, you can see and change this title from the backend at any time, and the widget value will update accordingly.
This works with your featured image using the Featured Image widget, author information using the Author Box widget, and the post content itself using the Post Content widget.
In fact, these Theme Elements are able to pull almost any value you would expect to see on a post or page, including site-wide information like your website logo or title.
As awesome as this is, dragging dynamic elements into a random post or page isn’t going to get you very far. After all, a dynamic page isn’t a theme.
The power here is in combining the dynamic elements with theme templates, allowing you to create dynamic templates that are able to apply to multiple pages at once.
This is understandably a difficult concept for anyone who isn’t familiar with how a theme works, but I’ll show you exactly how this combo fits together with a practical example later in the guide.
Component #3: Display Conditions
Display conditions are the last, but most easy-to-understand component to Elementor’s theme builder.
Even with templates that override core theme pages, or dynamic widgets that automatically pull in information, you still need a way to dictate when and where your newly built theme templates are actually shown on your site.
And if you’re thinking, “wait, isn’t that what the theme templates are for?” — you’re half right.
For example, a header template will display the content at the top of the page, on every page of your site, and a single post template will show on all of your post pages.
With display conditions, however, you can create multiple templates of the same template type and have them show based on specific rules.
This is necessary for two reasons:
- You can give priority to template types that are essentially fighting for the same space
- You can prevent template types from showing on certain areas of your site based on various scenarios
Whether it’s showing a different header for landing pages, or different blog post layouts depending on the post category, display conditions allow you to get more granular with your theme design.
Applying these rules is simple, and you’ll be asked to do so when publishing a new theme template.
Otherwise, you can access it from the publish menu:
Along with theme templates and dynamic widgets, display conditions give you the last piece of the puzzle when it comes to effective theme design.
That’s enough theory, let’s go through a practical example of how you can use this in your business.
Building Your Theme with Elementor
Okay, this is where the real fun begins. In this section, I’ll walk you through the exact steps to build your theme from the ground up.
Before you start building, you’ll want to have WordPress installed, Elementor Pro activated, and any theme activated (a free one is fine, it doesn’t matter).
As a bonus tip, it’s always worth bookmarking well-designed sites you come across so you can use them as inspiration for builds like this. After all, why reinvent the wheel?
The core WordPress theme templates we’ll be building here are:
- The header and footer
- The archive page
- The single post
- The 404 page
- E-commerce variants of the above
Note: We will not be building regular, static pages such as the home page, about page or contact page, as these are not a feature of the theme builder specifically, and have long been possible with page builders.
Right, let’s kick things off by…
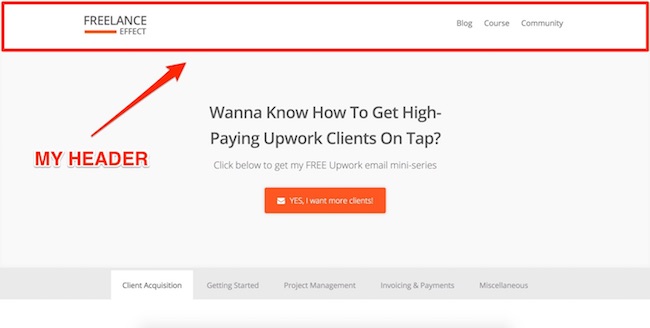
Building Header & Footer Templates
The header and footer templates are separate and do work independently of one other, but the way in which you build these with Elementor is essentially the same.
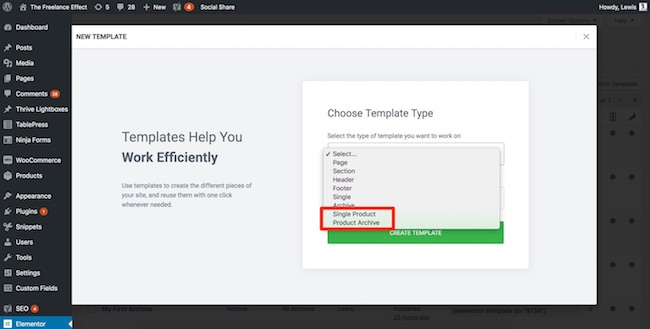
First, create a new template and select the “Header” or “Footer” option from the template type drop-down:
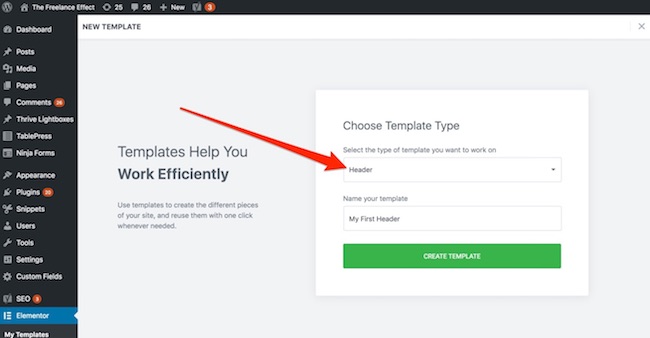
After naming your template, you’ll be taken to the visual editor.
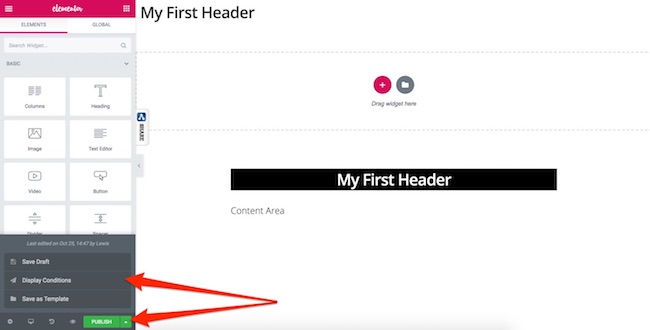
From here, you can begin building out your header from scratch, or click the template icon to open the new ‘Block’ templates library:
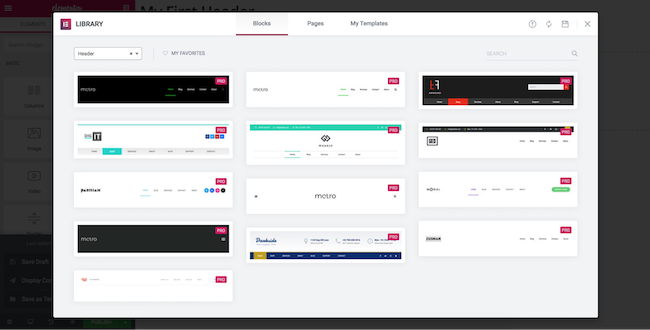
At the time of writing, there are 13 header blocks and 14 footer blocks to choose from, each with their own unique layout and style.
For this example, I chose this blocking template:
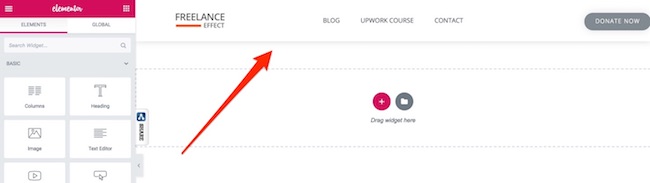
As you can see, the dynamic widgets used within this template automatically pulled in my site logo and navigation links — and the same would be true for a footer template.
Of course, you can make any number of edits to this as you would with any other Elementor template, but blocks are a great way to get you started with a workable concept.
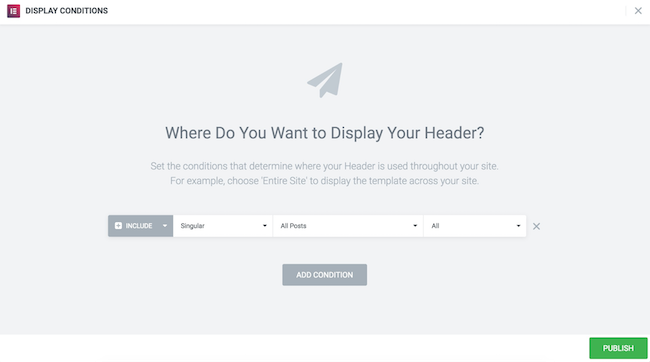
Once you’re happy with your header or footer, clicking publish will trigger the display conditions screen:
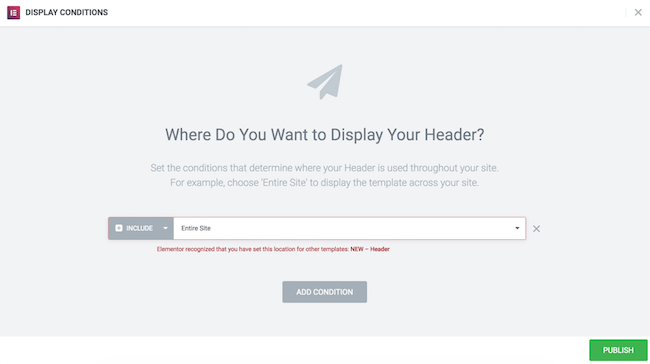
Note: Notice that Elementor tells me I already have another header template with the same display condition, allowing you to quickly identify conflicts and adjust your conditions accordingly.
Building An Archive Template
An archive page is a collection of post snippets that are grouped by either category, author, date, tag, or other WordPress taxonomy.
A typical example of this is what most people use as their “blog” page, which groups ALL posts together and is referred to as a ‘post’ archive.
Building this page in WordPress has long been a challenge, but Elementor’s theme builder gives you complete freedom over how it looks and behaves.
First, create a new template and select the “Archive” option from the template type drop-down:
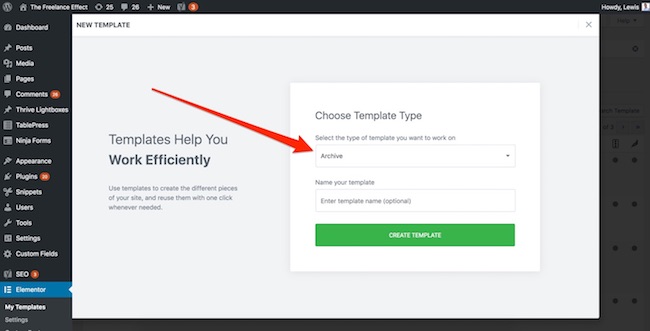
Again, name your template and click the green button to start building in the visual editor.
Going straight into the block templates, you’ll find 9 archive layouts:
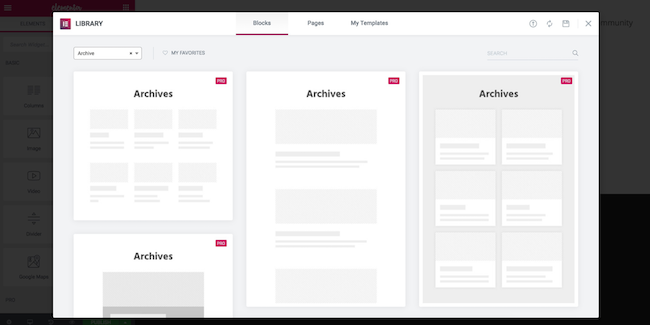
These include everything from grid, card, single-column, and sidebar layouts, so you should have no trouble finding something close to your vision.
For this example, I chose a simple 2-column card layout:
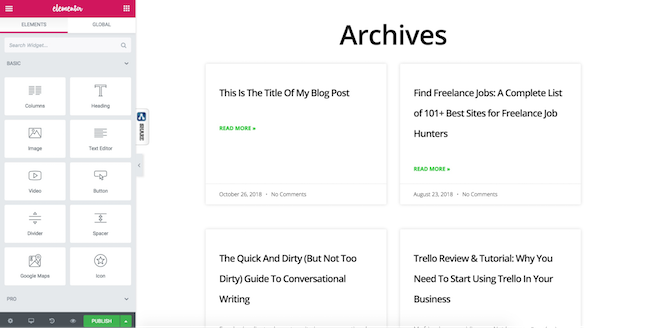
Once again, the dynamic widgets used in this template are able to pull in the post information, and will automatically update when publishing future content.
Like with the header and footer, you can style this page however you wish using Elementor’s styling options, so you’re not fixed into the block template you initially chose.
Finally, publishing will trigger the display conditions window. This time, you’ll notice a different set of options from what you saw with the header and footer:
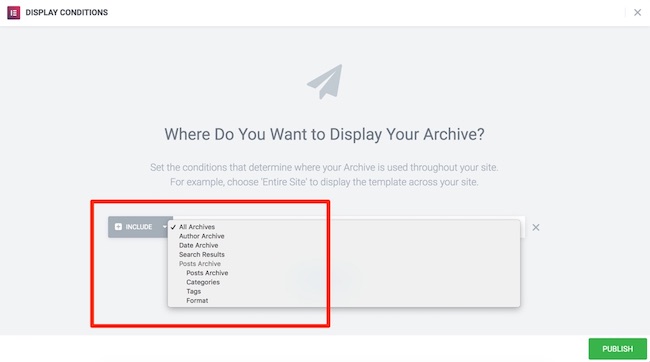
This tells Elementor what type of archive you want this to be (or replace in your active theme) — including the option to apply this design to all archives on your site.
Building A Single Post Template
Unlike the blog archive which governs how your blog post snippets are organized, the single post template governs your actual, full-length blog posts.
A blog post is often the entry-point for most visitors to your site, making this theme template perhaps the most crucial of the bunch. (It’s also my favorite one to get creative with.)
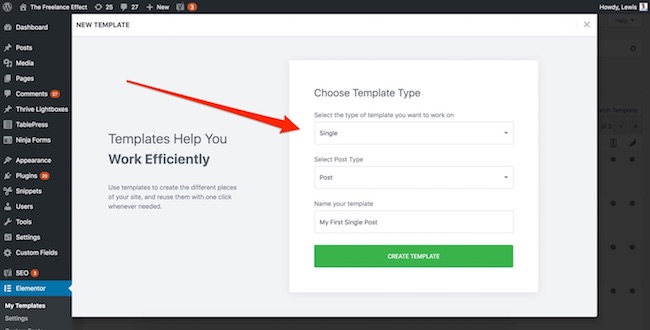
To create one, it’s back to the template screen where you’ll now select the ‘Single’ and ‘Post’ options:
After launching the editor, you guessed it… you’ll immediately see block templates for this post type.
Personally, I think this is one of the few post types you might want to consider building from scratch as the templates aren’t amazing, but you can always improve on them as well:

There are only 7 of these blocks available with most of these being added very recently, so don’t expect too much help here.
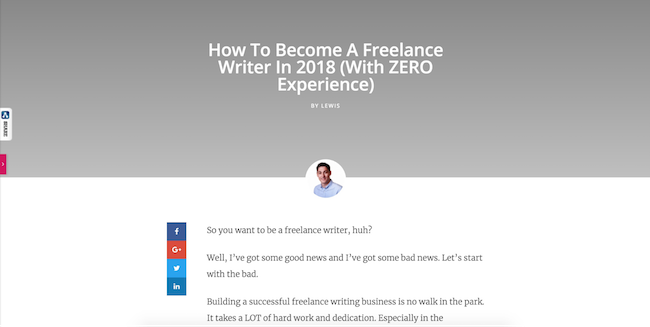
For this example, I went with one of the more appealing block designs (even though my posts don’t use a featured image… oops).
As with every template type I’ve shown you so far, Elementor gives you granular control over the widgets and sections used here so you can make your blog posts look exactly the way you want.
Now, notice how it pulled in my “How to become a writer” blog post to preview the design?
Using the preview settings, you can select which of your posts are demoed to get a better idea of how your different pieces of content adapt to your Single Post template.

While these preview settings are available for all theme templates, it’s here that I found myself using it most.
On to the display conditions, and this time you’ll be presented with the same options you had with the header and footer:
These conditions allow you to use different post designs based on different categories, tags or other taxonomies that a post exists within.
Note: You can also create single page—not post—templates with Elementor’s theme builder, and these tend to be useful for websites that rely on custom fields to display information. I’ll talk more about that shortly.
Building Your 404 Page
Another page that was previously a PITA to modify is the 404 page, shown when a URL on your site leads to a non-existent page.
While you hope that few people get to even see this page, having the ability to design it can help reroute visitors who might otherwise leave your site.
You can select the 404 post type option under the ‘Single’ template:
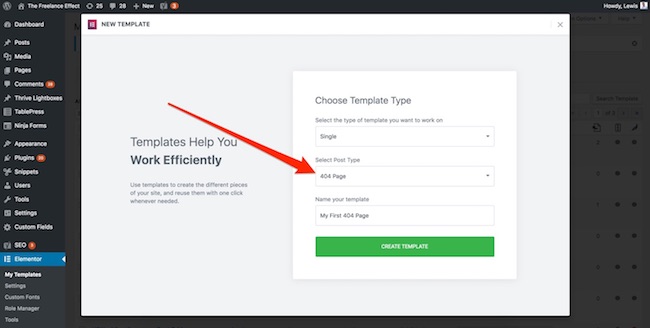
Once again, naming your template and clicking the green button will launch you into the Elementor editor.
Unlike previous templates, however, it’s unlikely you’ll use any dynamic widgets here as the 404 page tends to be a static page.
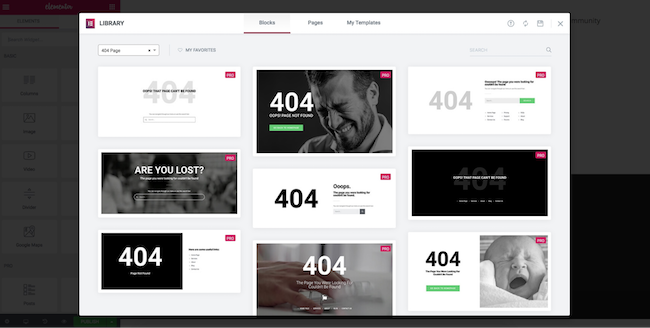
In terms of blocks, you can choose between 9 tidy-looking templates to use right out of the box:
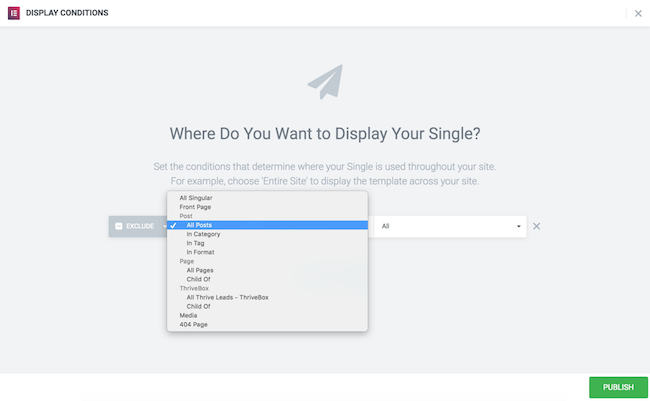
Display conditions are also somewhat irrelevant here.
While you can bring up the display conditions window, you won’t find any options other to include or exclude the template from your site:
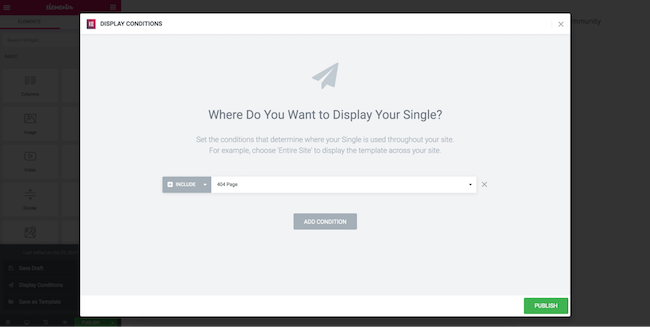
This of course makes sense given that a 404 page has its own inherent display conditions — when a page no longer exists.
Finally, don’t be afraid to venture out from the proposed templates have some fun with this page, as plenty of others have .
Building E-Commerce Theme Pages
You can’t have a complete theme builder without supporting e-commerce sites, and Elementor knows this too well.
Soon after the release of Elementor Pro 2.0 – which introduced their theme builder – Elementor released a WooCommerce update that would give the same level of freedom to e-com businesses.
How does it work?
Essentially, you get two additional theme templates. One for your product archives, and one for your product listing.
- Product Archive: Much like a post archive, a product archive displays a preview of multiple products, typically in a grid or list view.
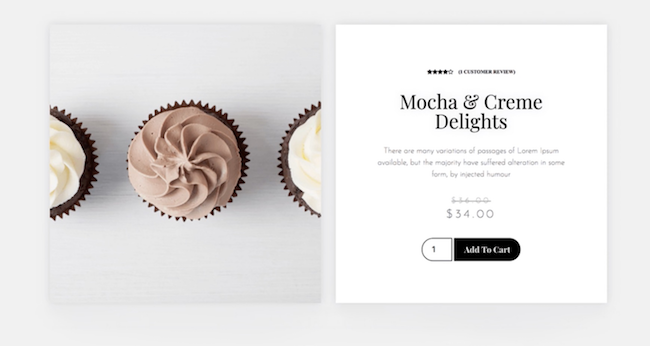
- Single Product: The product listing page that displays elements such as images, a description, features, pricing and an order button.
These templates will become available once the WooCommerce plugin is installed and activated for your site:
From there, you’ll be able to choose from a selection of e-commerce blocks for both template types.
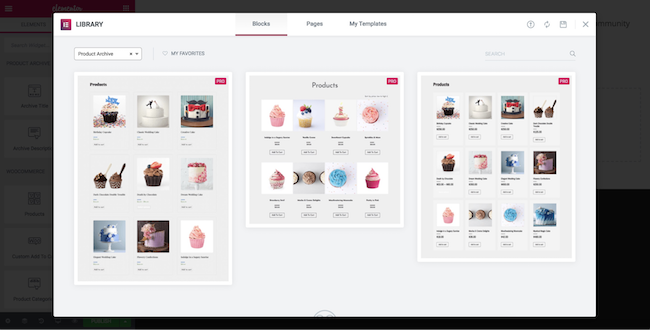
You’ll have 3 options to choose from for the Product Archive template:
And you’ll have 4 options to choose from for the Single Product template:
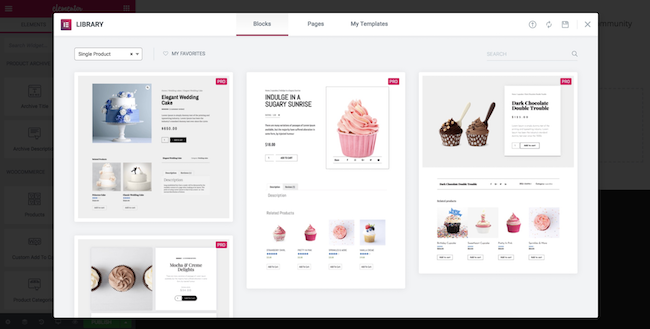
I think this is probably the weakest area for Block templates, but again, they offer a solid foundation to work from if you need some inspiration.
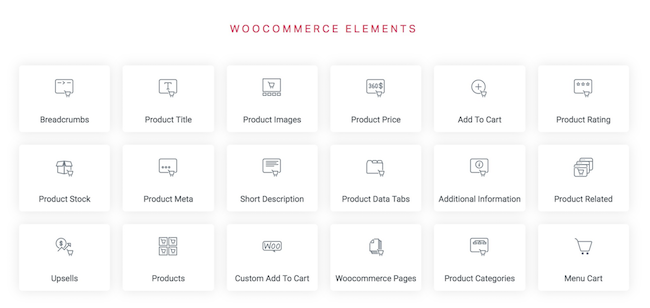
The WooCommerce builder also brings with it a slew of additional dynamic widgets that pull information from the WooCommerce backend, allowing you to build and customize these pages to your exact specification.
These widgets include everything from:
- Product Title
- Gallery
- Images
- Price
- Rating
- Short Description
- Stock
- Related Product
- Upsell Offers
- Add to Cart
- And loads more
As you can see, Elementor has leveraged the same components that make up the theme builder, and applied them equally as well to the WooCommerce builder.
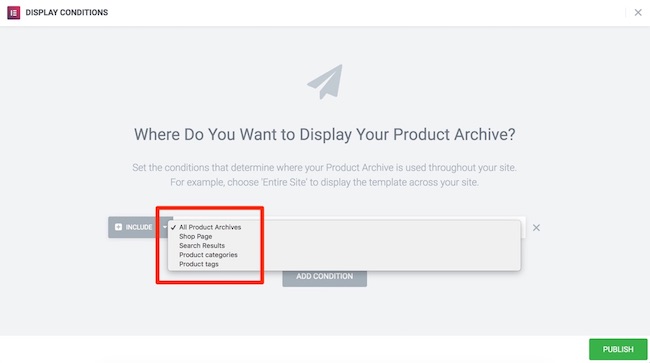
All that’s left now is display conditions.
For Product Archive templates, you’ll find some unique display settings here that are directly tied to WooCommerce pages:
And the same goes for Single Product pages:
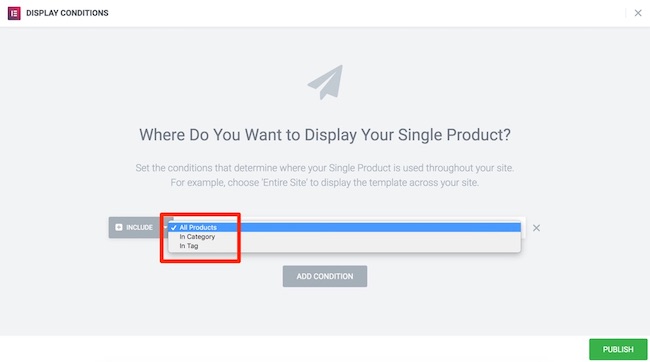
These conditions give you as much power over your online store as any content-based site is able to have using Elementor, and that is a huge leap forward for e-commerces businesses using WordPress.
Impressed? you should be.
Final Thoughts
Customizing your WordPress theme used to be hit or miss depending on which theme you decided to go with. Some themes are very customizable while some aren’t. And if you chose one that wasn’t then you’d have to hire an expensive WordPress designer to create a design that you were happy with.
But this is all changed with Elementor Pro’s WordPress theme builder. With it, you can customize any WordPress theme however you want it, all by yourself.
I hope this Elementor Pro theme builder tutorial gave you a better idea of how it works and how easy it is to use.
You can pick up Elementor Pro for just $49 for a single site license and I would highly recommend trying it out, if you are looking to make customizations to your WordPress theme.
>>>Join The One Funnel Away Challenge<<<