
Free
How to Add Watermark to your Videos
Introducing Watermarks:
What They Are and Why You Need Them for Your Doodly Videos
Watermarks play a crucial role in our short video ads for Doodly, promoting products and services. But what exactly is a watermark? Let’s dive in.
Watermarks come in two types: visible and invisible. Visible watermarks, dating back to 1282 in Italy, were originally stamped onto paper during the wet-paper phase of papermaking. With the advent of computers, watermarks found their place in the digital realm, appearing on documents, images, and online videos. These watermarks are transparent or light to ensure they don’t disrupt your work, serving as both copyright protection and discreet branding.
Now, let’s turn our attention to invisible watermarks, also known as digital watermarking or fingerprinting. This technique allows creators to upload their work online and track down any illegal copies, taking appropriate legal action. Digital watermarking adds identifying information that’s invisible to the human eye.
Today, we’ll focus on visible watermarks for our Doodly videos.
So, why should you add watermarks to your videos?
Adding a watermark serves multiple purposes. Firstly, it helps identify your work and deters others from using it without your permission or claiming it as their own. While it won’t completely prevent people from using your video, it certainly makes it more challenging for them to claim ownership. Additionally, watermarks contribute to brand awareness, promoting your brand subtly without explicitly telling people about it. Lastly, watermarks ensure that clients don’t take off with your video before paying their dues. These are just a few reasons why watermarks are essential.
Now, let’s explore some commonly used visible watermarks for videos, images, and documents:
– DRAFT
– CONFIDENTIAL
– DO NOT COPY
– LOGO
– BRAND NAME
– CREATOR’S NAME OR INITIALS
– SAMPLE
– RESTRICTED
– TOP SECRET
– DEMO
– COPYRIGHT
– FOR APPROVAL
– PENDING
– TENTATIVE
– PROOF
Ready to create your watermark?
If you’ve already added a watermark to a Doodly video, you may have placed your logo in each scene individually. But there’s a better way! We’ll guide you through using a custom background for a more consistent watermark throughout your video.
Here’s the step-by-step process:
Step 1:
Choose graphic design software or a photo editor with a 1920 x 1080 template or customizable dimensions. Make sure it allows you to adjust opacity for imported images or text.
Here are a few software options you can try:
– Pixelmator pro (Mac OS)
– Canva (Mac and Windows)
– Design Wizard (Mac and Windows)
Step 2:
Let’s use the web-based design maker pixlr.com/e for our walkthrough. Click “Create new.”
Step 3:
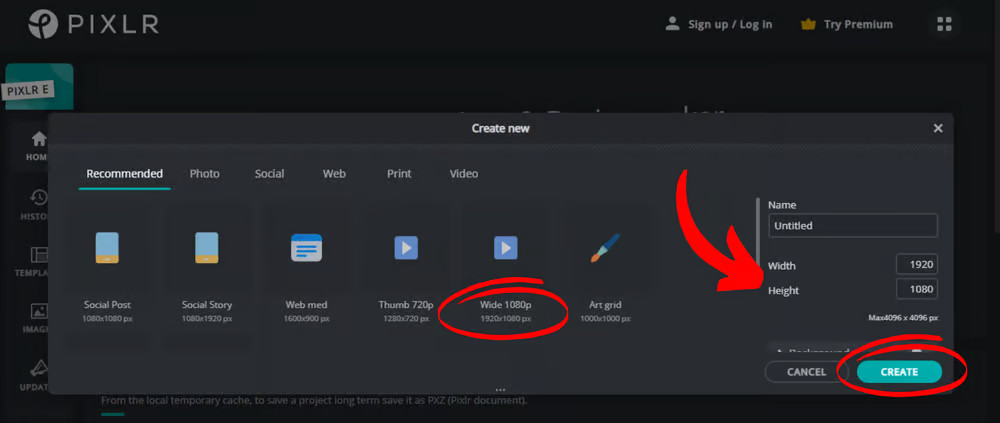
Select the 1920 x 1080 px template or input the dimensions if not available. Click “Create.”
Step 4:
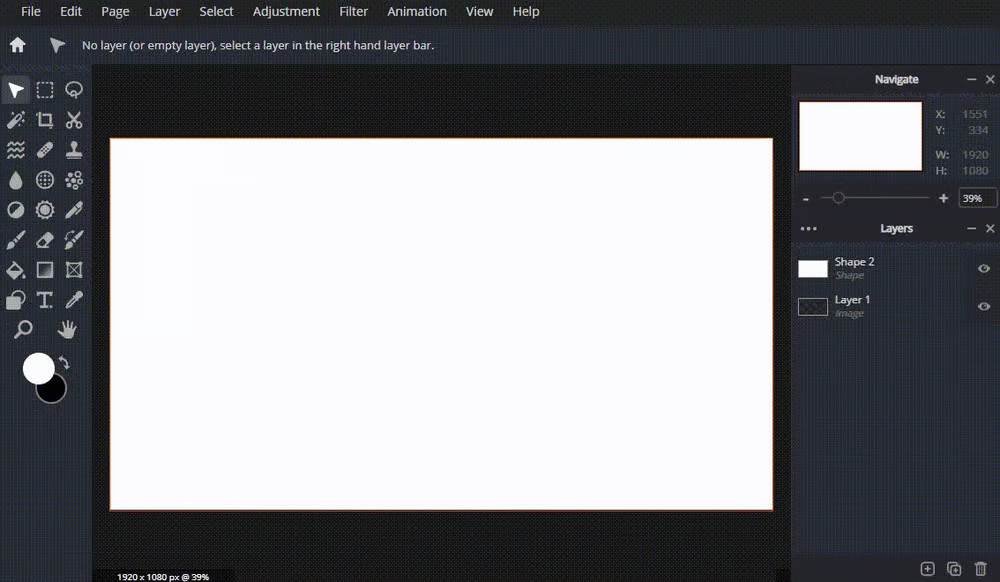
Add a rectangle shape to fill the blank space (optional for some software with a white blank canvas).
Step 5:
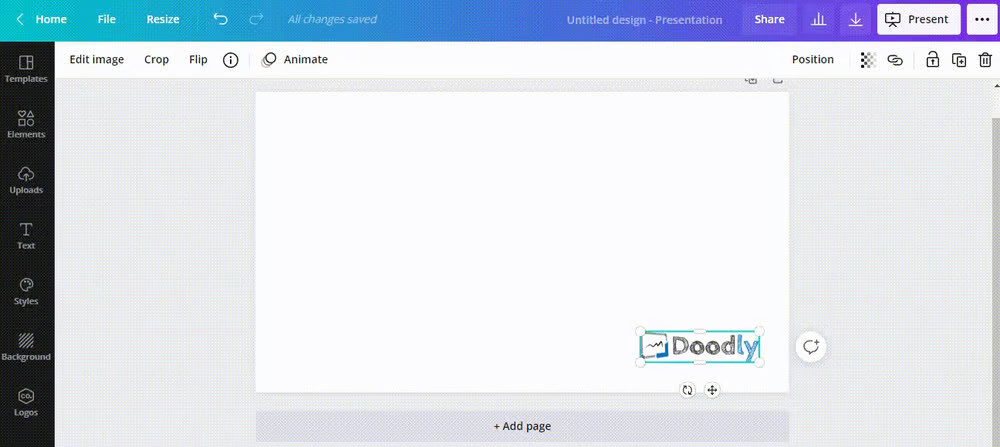
Import or paste your logo onto the white rectangle screen. Some software may require purchasing before importing a logo.
Step 6:
Reduce the opacity of your logo. In our example, we set it to 30%.
Step 7:
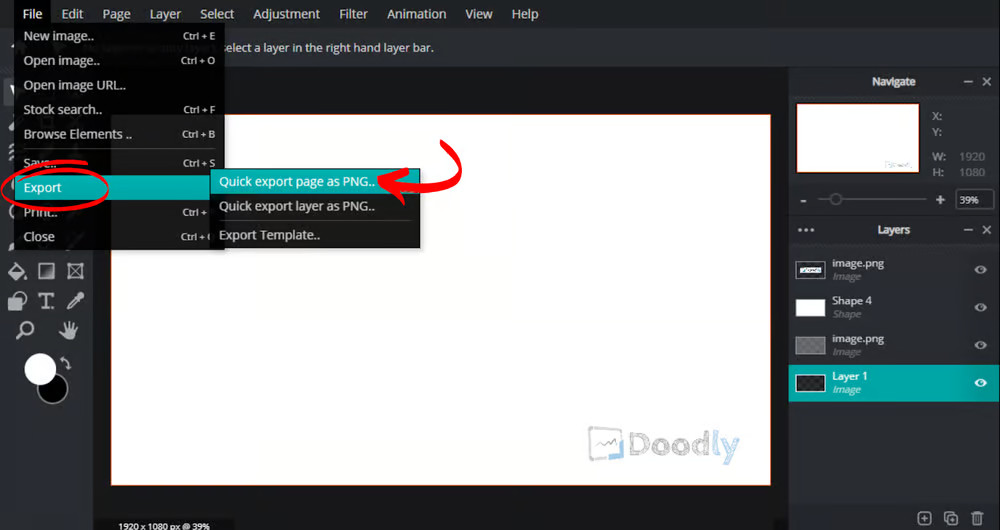
Export your finished custom background with watermarks and save it on your computer.
Remember, watermarks are typically placed at the bottom right side of the video, but you can also position a larger logo in the center of your whiteboard.
Besides logos, you can also use text as watermarks, especially when indicating drafts or confidential work.
Now go ahead and elevate your Doodly videos with eye-catching watermarks that protect your work and promote your brand.
How to Import Your Watermark in Doodly
Ready to make your videos stand out with a custom watermark? Here’s how you can import it into Doodly:
1. Open Doodly and navigate to Video Settings.
2. Select “Custom” under Background Style.
3. Choose “Custom Image” and click on “Browse file” to locate the custom background with your watermark.
4. Resize and position the watermark to fit your scene perfectly. When you’re satisfied, click “Done” to save it.
The best part is, once you add the watermark, it stays consistent throughout your video. It won’t disappear with transitions or scene changes. Your watermark becomes a constant presence, protecting your work and enhancing your branding.
Removing the Watermark? Easy peasy!
Let’s say you’ve received payment from your client and need to remove the watermark from your video. Follow these steps:
1. Head back to Video Settings.
2. Choose “Whiteboard” as the Background Style and click “Apply”. This will remove the watermark without affecting your video. No need to worry about moving your scenes or assets.
And voila! You’ve learned how to add and remove custom watermarks in Doodly.
But wait, should you even bother with a watermark?
The decision to use a watermark is entirely up to you. While not mandatory, it can help protect your work against unauthorized use and contribute to your branding efforts. Doodly makes it super simple to add and remove watermarks. Give it a try and see if it enhances your videos. Don’t be afraid to apply a watermark to your creations. 🙂


