

Free
How to Create a Flowchart in Doodly
Flowcharts are a powerful tool for visualizing processes and organizing tasks. Traditionally, we rely on tools like PowerPoint or Visio to create flowcharts. But imagine if you could bring your flowchart to life in an animated video, with an animated hand drawing as your voice-over plays. It’s possible with Doodly!
In today’s blog, we will show you how to create a flowchart in Doodly and explore the flowchart symbols available. We’ll also share other ways to find symbols for your flowchart if you can’t find the right one in Doodly.
Where to Begin
Flowcharts have wide-ranging applications in industries like entertainment, engineering, and computer programming, among others. Often, we start by drawing our process flow on a whiteboard as we brainstorm with colleagues. But how do we transfer those drawings into Doodly for our videos?
There are two simple options:
Option 1: Take a picture of your whiteboard drawing, save it on your computer, and import the image into Doodly.
Option 2: Draw your process flow on a clean sheet of paper, take a picture of it, and upload it to Doodly. This option is especially useful if the handwriting on the whiteboard is not clear.
Importing Flowcharts to Doodly
Let’s walk you through the step-by-step process of importing an image into Doodly:
1. Log in to Doodly and click “Create New Video” on the main screen.
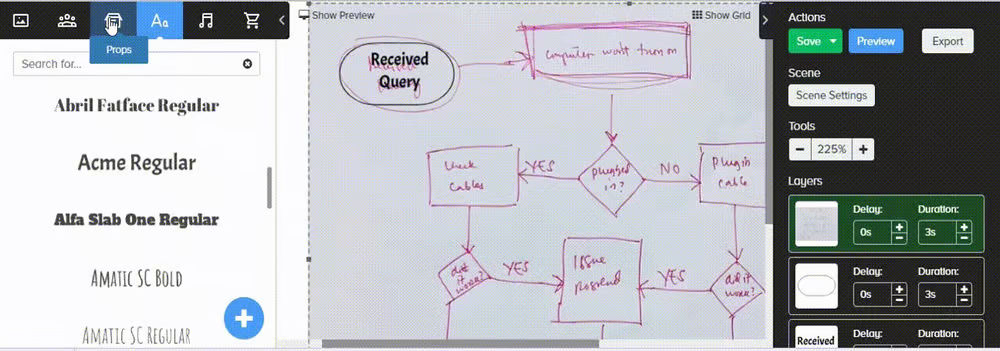
2. Go to the Assets panel, click the blue “+” sign next to “Props.”
3. Browse your files and import your handwritten flowchart image. Hit continue.
Now that we have our handwritten flowchart imported, we can start working on our first scene. But before that, let’s familiarize ourselves with the commonly used flowchart symbols.
There are various symbols used to illustrate processes in flowcharts, but here are the most commonly used ones:
When creating flowcharts, it’s okay to use variations of shapes and arrow styles. However, for clarity and visual appeal, it’s best to use the correct symbols for each step in your process.
Doodling with Flowcharts
A. The First Scene

To start creating our flowchart in Doodly, we first drag the imported image onto a blank scene. Don’t worry if the handwriting and lines aren’t perfect – we’ll use the imported chart as a guide.
B. Doodly Shapes
Since we’re making a flowchart, we’ll primarily be using shapes as props. Doodly offers a wide range of shapes to choose from. To find them, go to the Props tab and select “Shapes” under Categories.
C. Adding the First Asset
Let’s begin building our chart. As you can see, our chart consists of shapes, text, and arrows. It’s important to add them in the correct order to ensure they appear correctly in our video.
D. Adding Text
Next, we’ll add the text. Doodly provides various font options, but you can also import your own preferred text format.
E. Adding the Arrow
Lastly, we’ll add the arrow. We want the arrow to appear right after the text, so we’ll place it accordingly.
If you can’t find your preferred symbol in Doodly, or if you want more customization options like dashed lines or different arrow colors, you can explore Microsoft Word’s shapes and import them into Doodly.
Here’s how:
Exporting Flowchart Symbols from MS Word
1. Open Microsoft Word and click the Insert tab.
2. Locate “Shapes” and choose the shape you want to use from the dropdown.
3. Click and drag your mouse on the blank document to create the shape.
4. Customize your arrow’s weight, color, arrow tip, and more by selecting “Shape Outline.”
Ready to create your flowchart in Doodly? Follow these simple steps to make it a breeze!
1. Edit your flowchart in MS Word.
2. Save each shape as a picture in your Downloads folder.
3. Import the shapes into Doodly and don’t forget to rename them.
Now, let’s start designing your flowchart:
F. Make the Flowchart
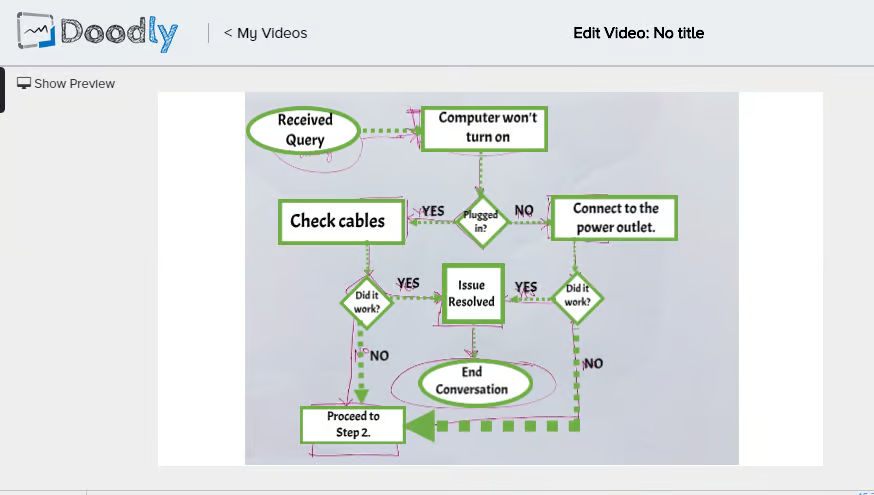
Arrange the symbols in the order you want them to appear in your video. If you already have the asset in your scene, just copy and paste it. No need to search and drag it again!
G. Speed things up.
Your flowchart might have several assets, so let’s change their animation duration to just 1 second instead of 3. This way, it won’t take too long for the video to finish.
H. Perfect the drawing.
Since the imported shapes might be scribbled diagonally, we’ll add a draw path to make them appear correctly. Let’s start with the ovals. And don’t worry, if you have multiple ovals, Doodly will take care of applying the draw path to all of them.
J. Remove unnecessary elements.
As we near the end of our flowchart, let’s get rid of the flowchart guide at the bottom layer. Simply delete the image or make its opacity 0.
Now, let’s fine-tune your flowchart:
– Adjust the symbols to prevent overlapping and maximize space in your scene.
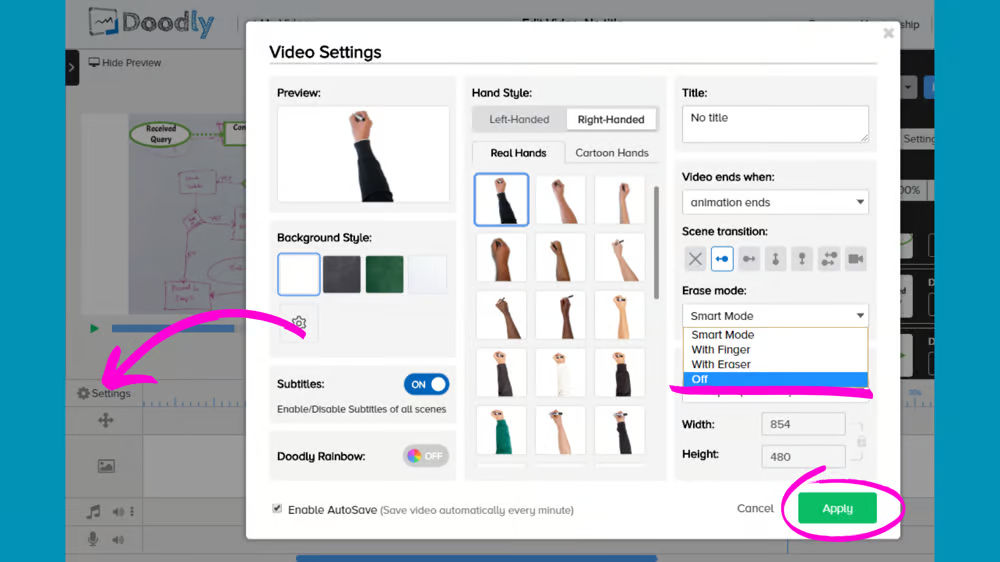
– When you’re satisfied with the result, add your voice-over and any necessary delays.
And that’s it!
You’ve reached the end of our flowchart walkthrough in Doodly. We hope you found it helpful and enjoyable. Now it’s your turn to start doodling your flowchart. Happy creating!🙂


