
Free
Ways to Draw Attention in your Doodly Videos
Creating an informative video is great, but sometimes it’s not enough to capture your audience’s attention. You need to use techniques that draw their eyes to specific areas of the screen. In Doodly, there are ways you can do this to ensure your viewers remember the important points in your presentation.
In today’s blog, we’ll discuss different ways to make your videos more interactive, interesting, and eye-catching. These tips will help push your story forward and keep your viewers engaged. Let’s dive in:
Be selective with hand drawings.
Hand drawings are a fun feature in Doodly, but it’s important not to go overboard. Having too many assets being drawn by hand can overwhelm your viewers. Instead, strategically choose which assets the hand should write or draw. Focus on the main characters or important text to grab attention. Remember, people have short attention spans, so you only have a few seconds to hook them before they move on.
Reveal images automatically.
In some scenes, you don’t need to draw the image with a hand animation. By revealing the image without any transition or hand drawing, you can save time and keep your viewers engaged. Simply update the drawing duration to zero (0) in the Layers settings. This way, the image will be shown instantly.
Use colors to highlight headlines.
Colors are attention-grabbing, especially when used to highlight important text like headlines. By adding colors to your subject lines, you can help viewers quickly grasp the main topic of your video. Keep the rest of the text in black and white to give the spotlight to your headline.
Utilize colors for bullet points.
Each bullet point in your video serves as a talking point, guiding your discussion. By applying colors to each bullet point as you talk about them, you can help viewers focus on what you’re discussing. The highlighted color indicates that your discussion is related to that specific bullet point. It also keeps you on track and prevents confusion about the next topic.
Duplicate scenes for easy adjustments.
If you have multiple bullet points or topics to discuss, it’s helpful to duplicate scenes instead of making changes individually. This saves time and ensures consistency throughout your video. Make the necessary adjustments to your first scene, and then duplicate it for each bullet point. This way, you can easily add text color to each scene as you discuss the corresponding topic.
1. Get started on your video creation by following these simple steps:
– Set the transition of your first scene to NONE. It’s easy to do, just go to Scene Settings and choose “X” or None under Exit animation.
– Double-check the sequencing of your Layers to ensure everything appears in the right order. Preview the scene to make sure each asset is drawn correctly.
– Now, duplicate the first scene by right-clicking it in the timeline and selecting Duplicate.
2. Let’s move on to modifying the second scene and creating the rest of your scenes:
Great news! We can now easily duplicate our second scene and create a whopping 9 additional scenes from it.
– Remove all the hand drawings from the Layers menu of the second scene to ensure smooth transitions between scenes.
– Add extra time at the end of each scene by selecting Scene Settings and adjusting the “Extra time at the end” setting.
– Once you have made these adjustments, duplicate the second scene to create the remaining scenes.
Hey, let’s see how our video turned out!
3. Now that you have all your scenes set up, it’s time to add color to your text:
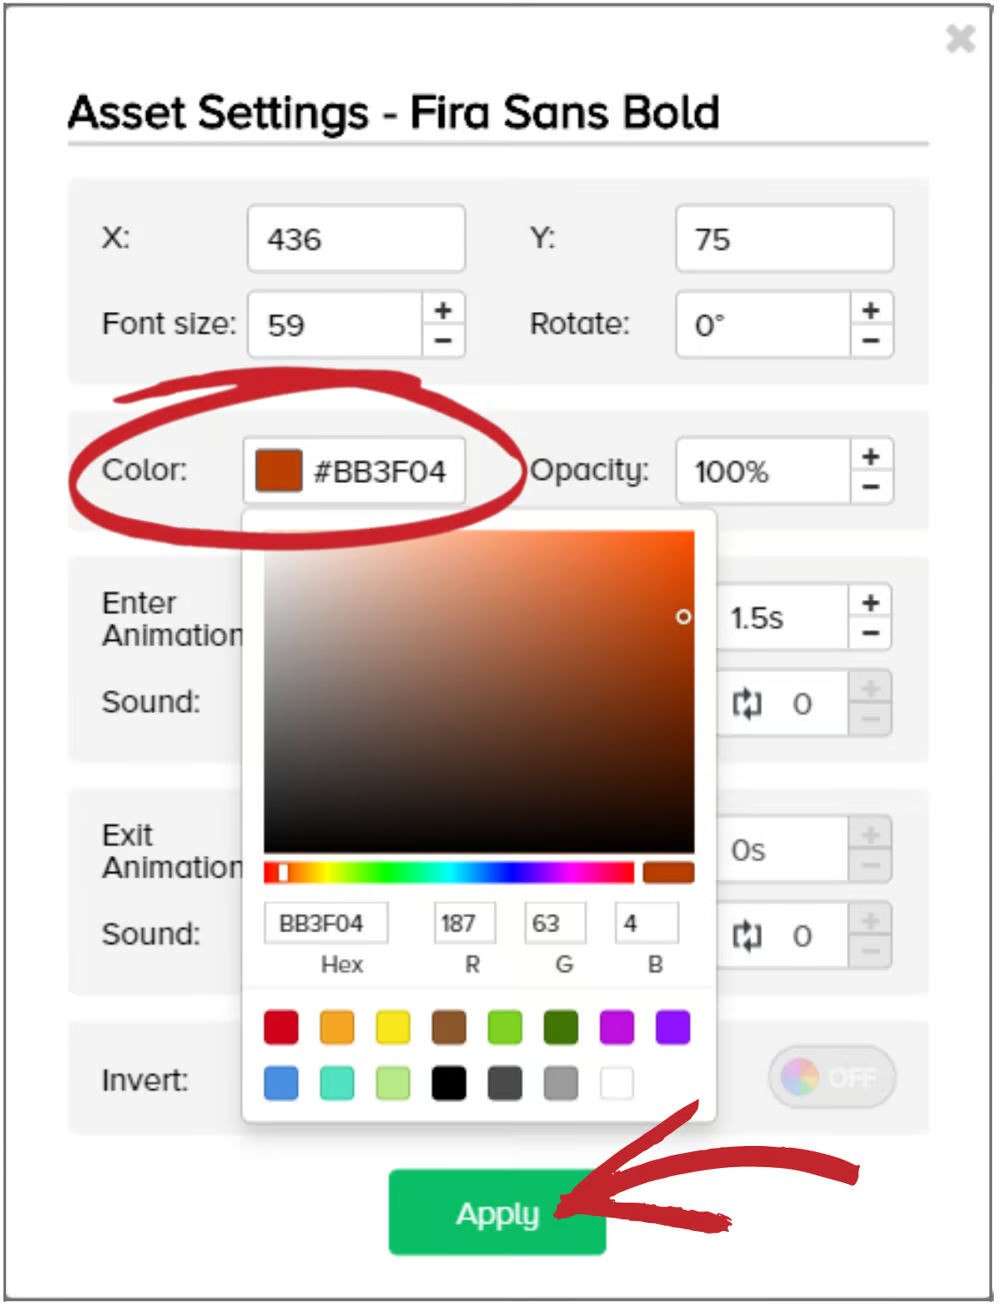
– Start with the second scene and choose the bullet point you want to color. Click the gear icon, choose your preferred color, and hit Apply. Repeat this process for each bullet point in each scene.
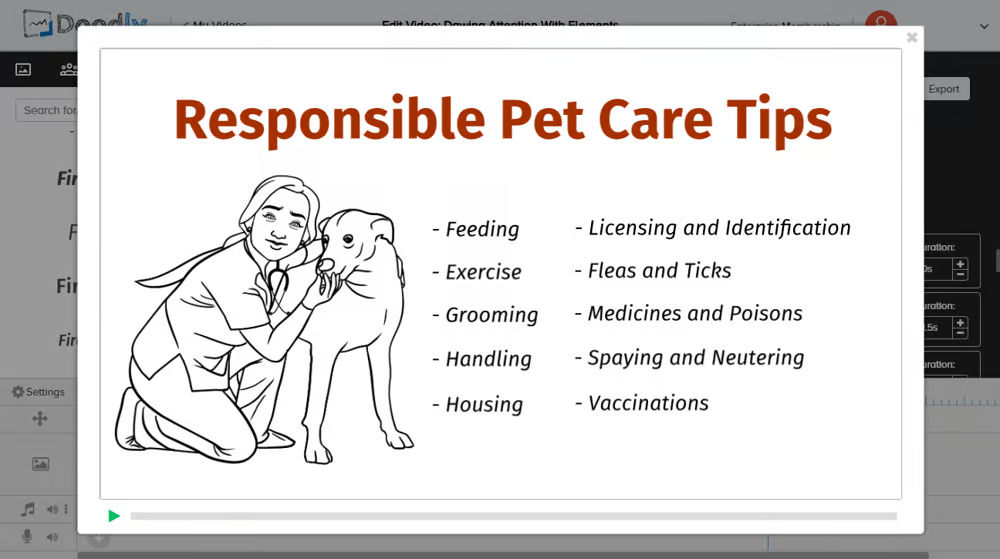
– Make sure you color each text in the correct order: Feeding, Exercise, Grooming, Handling, Housing, and so on.
4. Preview your video to see how it turned out and make any necessary adjustments. You can use the check icon to highlight a character or add other icons, shapes, or imported images to enhance your scenes.
5. Arrows can be used to draw attention to specific parts of your scene. If you can’t find the right arrow or icon, you can import images from websites like pixabay.com.
6. For a personal touch, try importing your own designs or drawings. You can use online graphic designing websites or a graphic drawing pad to create unique graphics for your video. It’s all about getting creative and making your video truly stand out.
Want to make your presentations more engaging? Try using camera movements like pan and zoom!
Pan and zoom allows you to focus on specific parts of your screen, directing your viewers’ attention to the most important elements. It’s especially useful for scenes with lots of characters and props, giving them an animated effect that stands out from regular presentations.
Here’s how to set up the pan and zoom effect:
1. Click on the pan and zoom icon in the timeline.
2. By default, it covers the first 7.6 seconds of your video, but you can extend it to wherever you want the zooming effect to apply.
3. Adjust the frame to zoom in on your desired image or area.
But remember, don’t leave your viewers with just one zoomed-in image for the entire presentation! To bring the camera back to its original focus, add another pan and zoom effect, this time expanding the view to capture the entire scene.
Check out our pan and zoom feature in action:
It zooms in on our image and then zooms out to show a hand writing our headline. Perfect timing!
That’s it for our list! Give these tips a try and let us know what you think. And if you have any other tips or tricks, feel free to share them with us on our Facebook page.
In summary:
– Use hand drawing or writing to capture attention, focusing on important assets in your scenes.
– Add color to your headlines and each bullet point to make them stand out.
– Use a checkmark icon to highlight sub-headers.
– Incorporate other icons, shapes, or imported images for variety.
– Utilize arrows to draw attention to specific elements.
– Look for additional props and characters on third-party websites with royalty-free images.
– Personalize your graphics by drawing or importing your own creations.
– Use the pan and zoom effect to direct your viewers’ attention in your scene.
We hope these tips help you enhance your presentations. Happy doodling!


